Pipeline
Overview
The pipeline is the core of Wethod. Here is where you can find and manage all the opportunities and projects of your company.
The different steps and phases of a project can be managed in different sections:
- Basket
- Pipeline Opportunities
- Projects
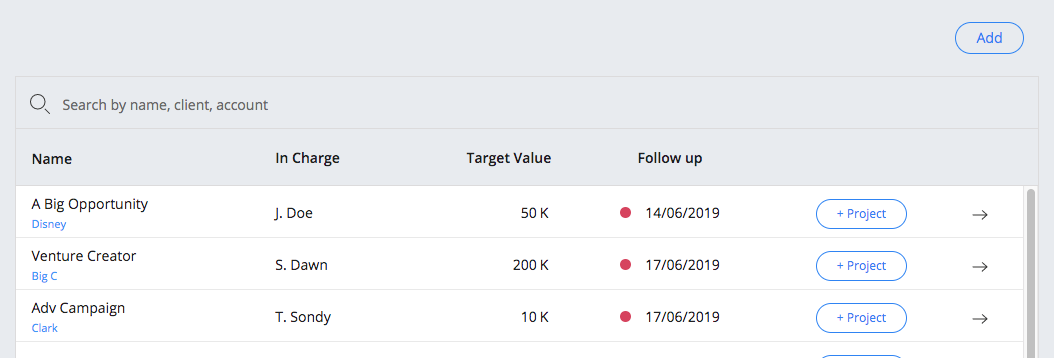
Basket
The Basket contains all the opportunities that are not well-defined yet. You can see it as a place where to put all the ideas that you usually write on a notebook or on a Post-It.
If you add a follow up date, WETHOD will remind you when the opportunity is expiring.
Use the arrow to edit, delete or simply get all details about an opportunity.
Projects and opportunities
Here you can find all the activities of the company. At first glance, you can see all the significant data of each one. You can customize the visible info by selecting the columns you need the most. See the selectable columns for further details.
To see all information about an activity, just click on the arrow button to open the sidebar details.
An opportunity evolves into a Project when things get serious, in order to take this step you must have an idea about the significant information listed above.
A Project can furthermore have an invoice plan and a budget.
A project is considered started if it has a start date in the past or if someone has submitted timesheets for it.
A project is considered active when its probability reaches 90%, only when this happens it makes sense to plan for people or to do a timesheet for this project. An active project must have a job order.
Note
Billable Projects must have a probability of 100%.
When a project status reach 0, it’s a good practice to archive it.
When a project reach 50% of probability, it’s a good practice to make a budget for it.
Available fields
An activity is defined by some basic information, that are always required.
This includes:
- Name: choose a name that represents your activity;
- Client: the company you are going to work for;
- Value (in K): estimated price you will sell the project;
- Percentage of external costs;
- Category: type of the project;
- Probability: how likely this project is going to start;
- Start and duration.
You can find more information about some key fields below.
Project probability
The probability defines how likely your activity is going to actually start.
This is a key information, so choose it carefully!
Here is a list of probabilities and their meaning:
- 0% - We lost it! Project is not going to be done
- 10% - The chances are low but maybe we can do something
- 25% - We can try it!
- 50% - I’m pretty confident we can do it!
- 75% - We are going to do it!
- 90% - We are going to do it and we now have the ‘job order’
- 100% - It’s all ready, we also have the ‘client PO’
Job order 🔜
Add the job order that identifies your project.
You can choose any formatting you like, as long as the job order you enter is unique.
To help you with this, you can take advantage of automatic generation.
Activate the feature from the company settings section, and associate a template with the job order categories you want.
This way, from the details of a project, you can create the job order by clicking on the “Generate” button. You will be prompted with the first available job order, following the formatting you have indicated in the template.
Remember that generation is not available if you have not yet activated the feature, or if the project’s category does not currently have any associated templates.
Client
Enter the client you are going to work for.
You can choose from all the companies available from the Client list section.
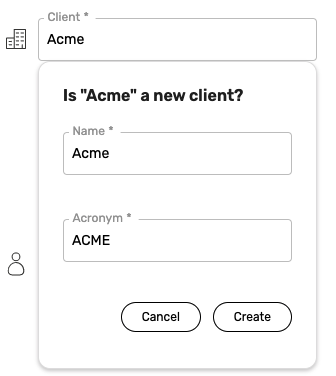
If the client you are looking for hasn’t been added yet, you can create a new one directly from the form that shows up.
Just type in the name and the acronym and click on the Create button.
Client contact
When you chose the client you are working for, pick the main contact you are talking with about the possible new project.
You cannot choose a contact before having selected the company.
As for the client company, you can create a new contact straight from the form that shows up, and see the complete list in the Contacts section.
You can make the client contact a required field in your company settings section.
Value
When creating a new activity, you will be asked to fill the value field. This represent the estimated selling price of your project, expressed in thousands.
Once you create the first budget for an activity, the amount displayed will always refer to the final net price you defined in the budget.
For this reason, the value cannot be edited after a budget has been created.
External costs
This is an estimate of the percentage of external costs regarding this specific activity.
While the activity has no budget you can edit this percentage. The amount of external cost in this case will be the value of the activity multiplied by the estimated percentage.
Once you create a budget, the external costs will refer to the ones specified in the budget, and will therefore not be editable from the activity details.
Start and duration
Choose when your activity will start and how long it will last.
When you move the start or end date of an opportunity (with a probability lower than 90%), its production plan will reflect the changes, adapting the duration and distributing the production accordingly.
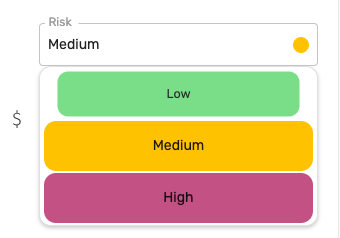
Risk
You can track the risk of a project directly from the Project list section.
This information is also available from the project status section.
For this reason, you cannot edit the risk of a project before you filled out its first project status.
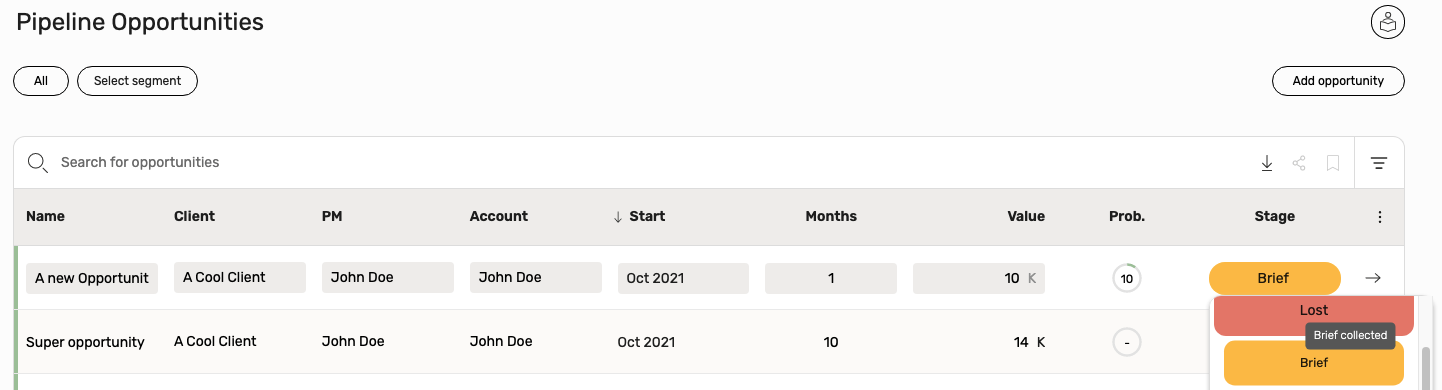
Status
A stage represents the status of an opportunity.
When dealing with opportunities it’s useful to track their status to quickly have a grasp of what’s going on. This also helps to filter and order the opportunities by their status. However for some opportunities we don’t need or don’t want to keep an eye on their stage. For this reason users can select if a Job Order Category should track or not its opportunities stage.
A default blank status is available for all opportunities whether we are tracking its stage or not. Additionally at least 2 others statuses are available if the tracking option is turned on. These two are the Won and Lost stages.
Stage and probability are tightly coupled if your opportunity’s Job Order Category is tracking the opportunity stage. When the probability of an opportunity is updated its status changes and vice-versa. This is true only for specific thresholds and is reflected only on the default statuses (blank, Won and Lost).
Visit the company settings page. if you wish to create a new status or edit the existing ones.
Timesheet whitelist
The timesheet whitelist is used to prevent some users from editing the timesheet in a particular project.
When the timesheet whitelist is enabled for a project, in fact, only users in this list can edit the associated timesheet. Not even the PM or the account are allowed to edit the hours when they’re not whitelisted.
Please note that the whitelist only affects the timesheet section. That means that being excluded from a timesheet whitelist does not keep you from seeing the project pages or the planning associated as you normally would. Find out more in the timesheet whitelist support page.
From the project details sidebar, you can see whether the whitelist is enabled or not, and all the employees in the list.
You can add and remove people from the list at any time, by editing the project details.
Create a new activity
Go to the appropriate section to create the desired activity:
- Opportunities: create a new opportunity with a probability ≤ 75%
- Projects: create a new project with probability ≥ 90%
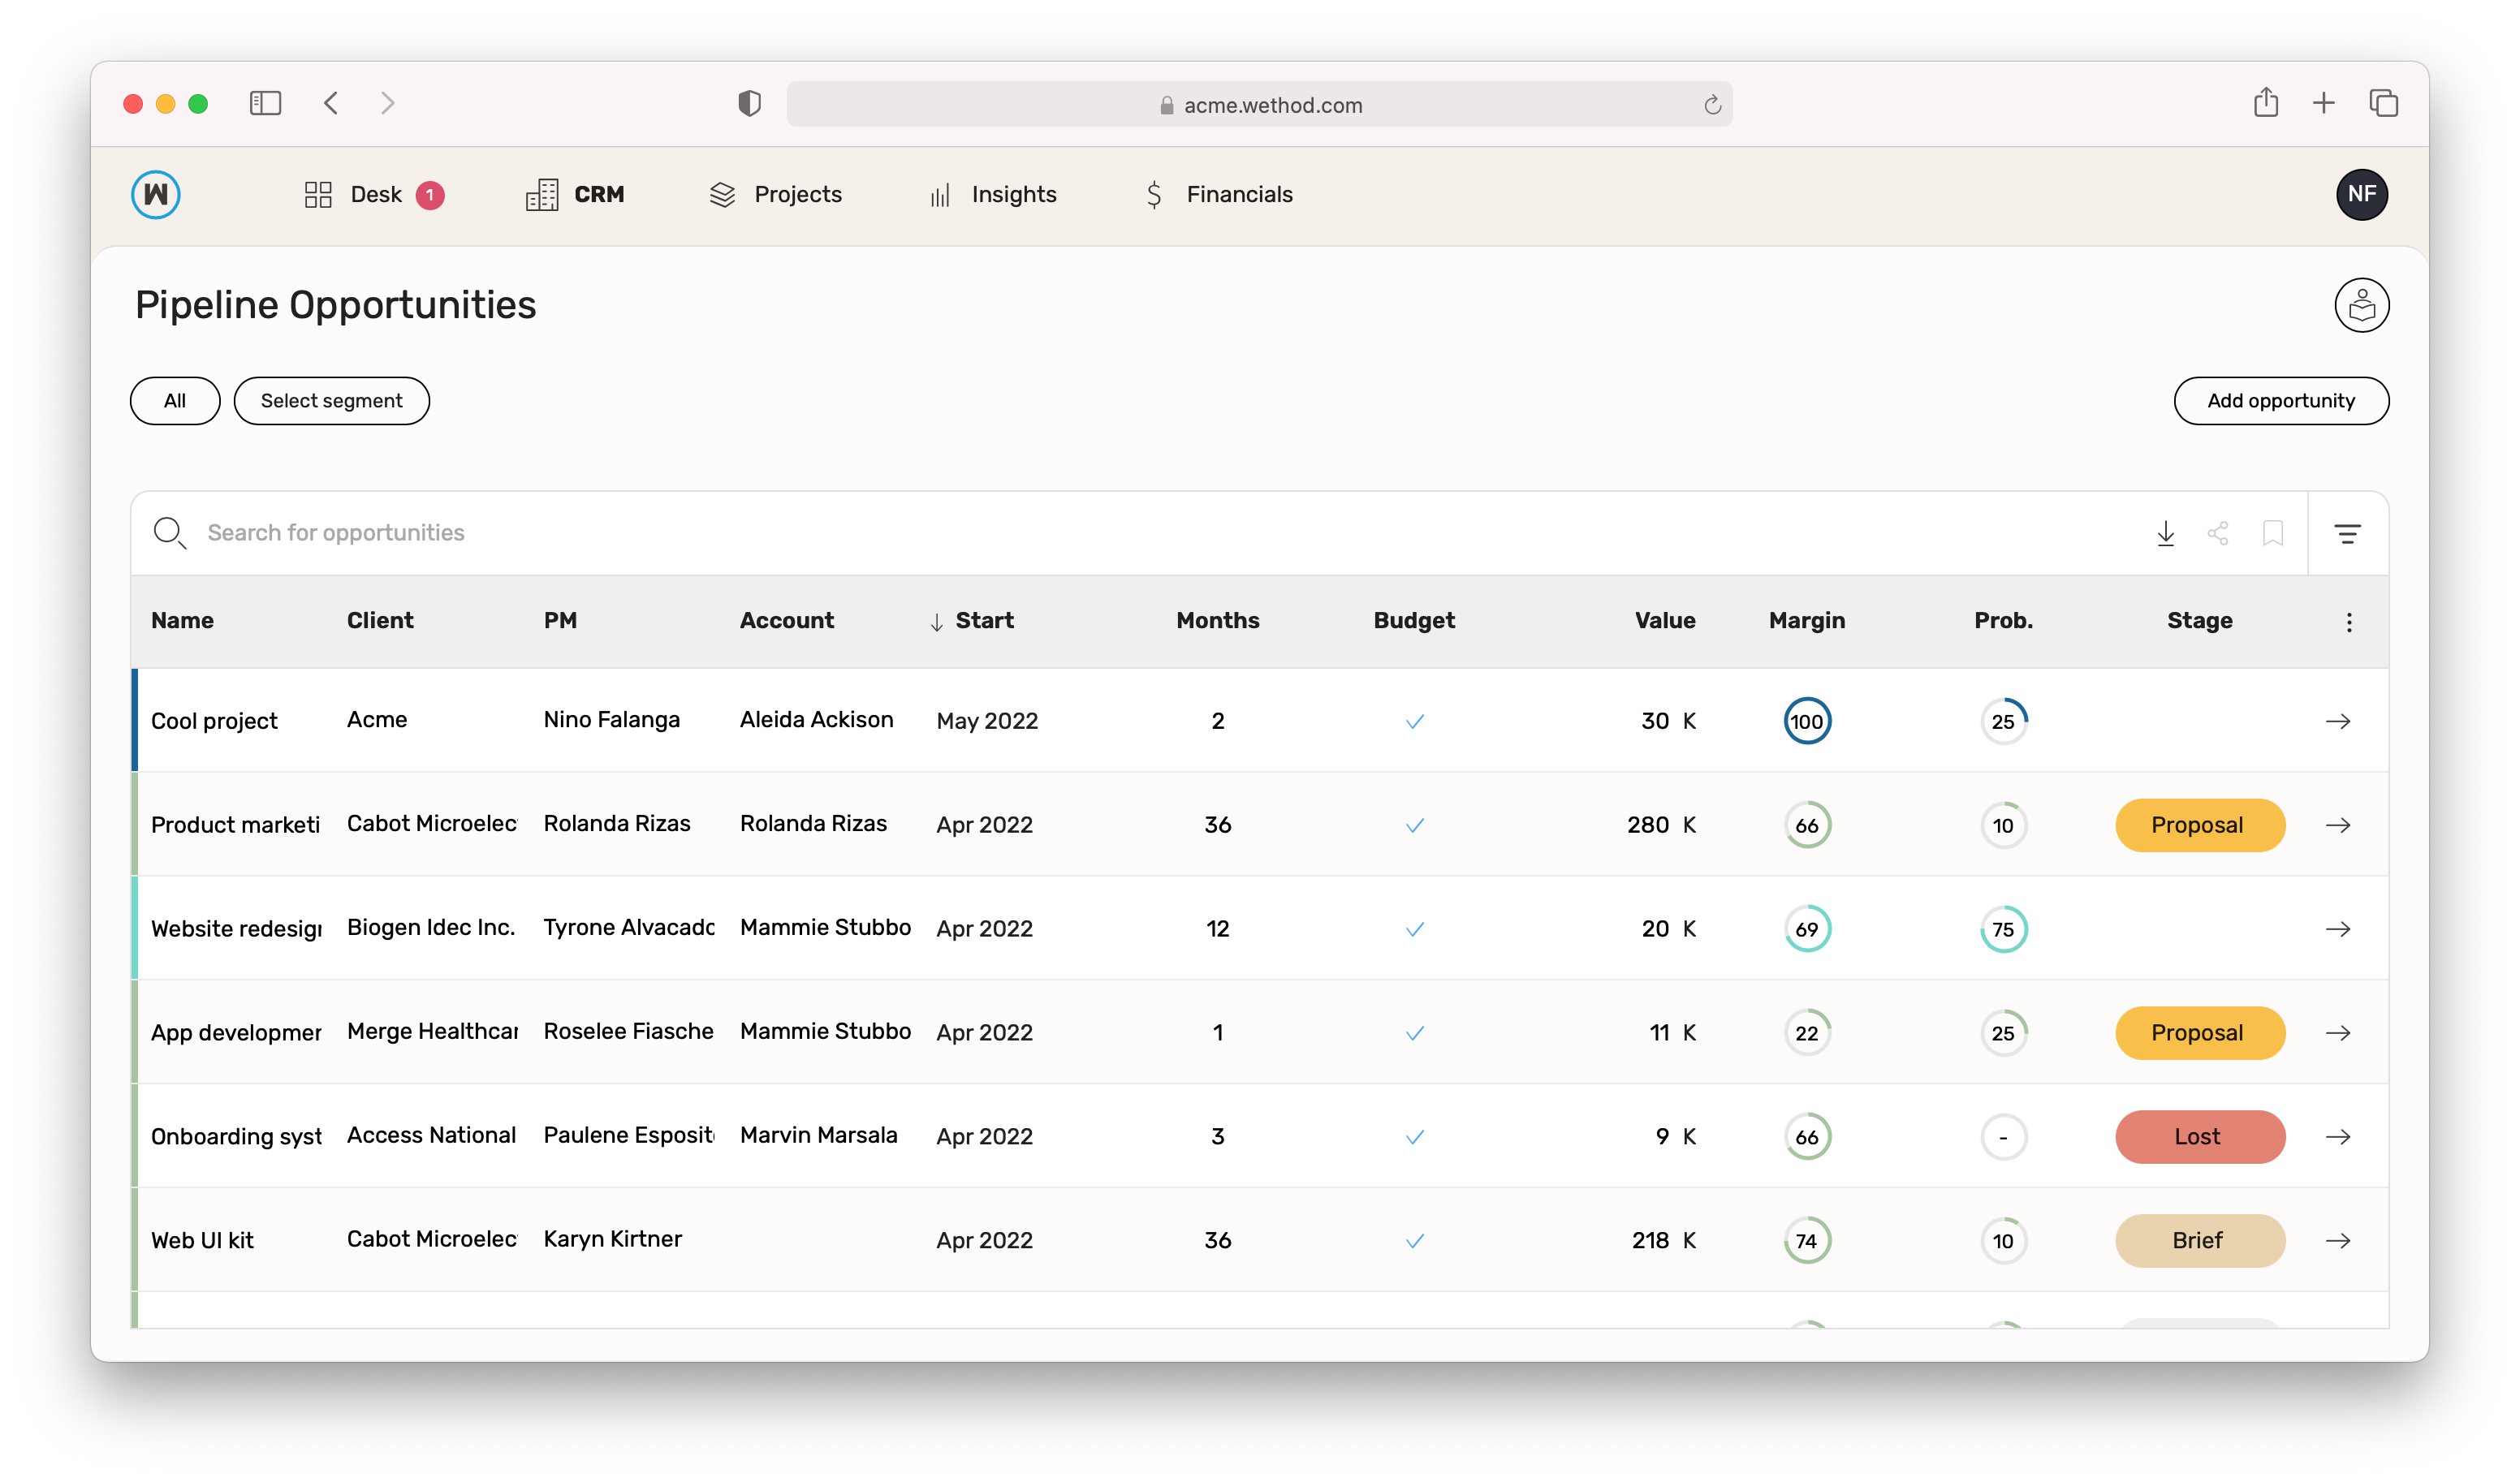
Opportunities
Click on the ‘Add opportunity’ button in order to show the project sidebar.
Here you can enter all the available project information.
The suggested probability is 10%, and you can only choose a value between 0% and 75%.
When you filled in all the required info, you can click on the ‘Save’ button. Your new opportunity will then be visible in the opportunities list.
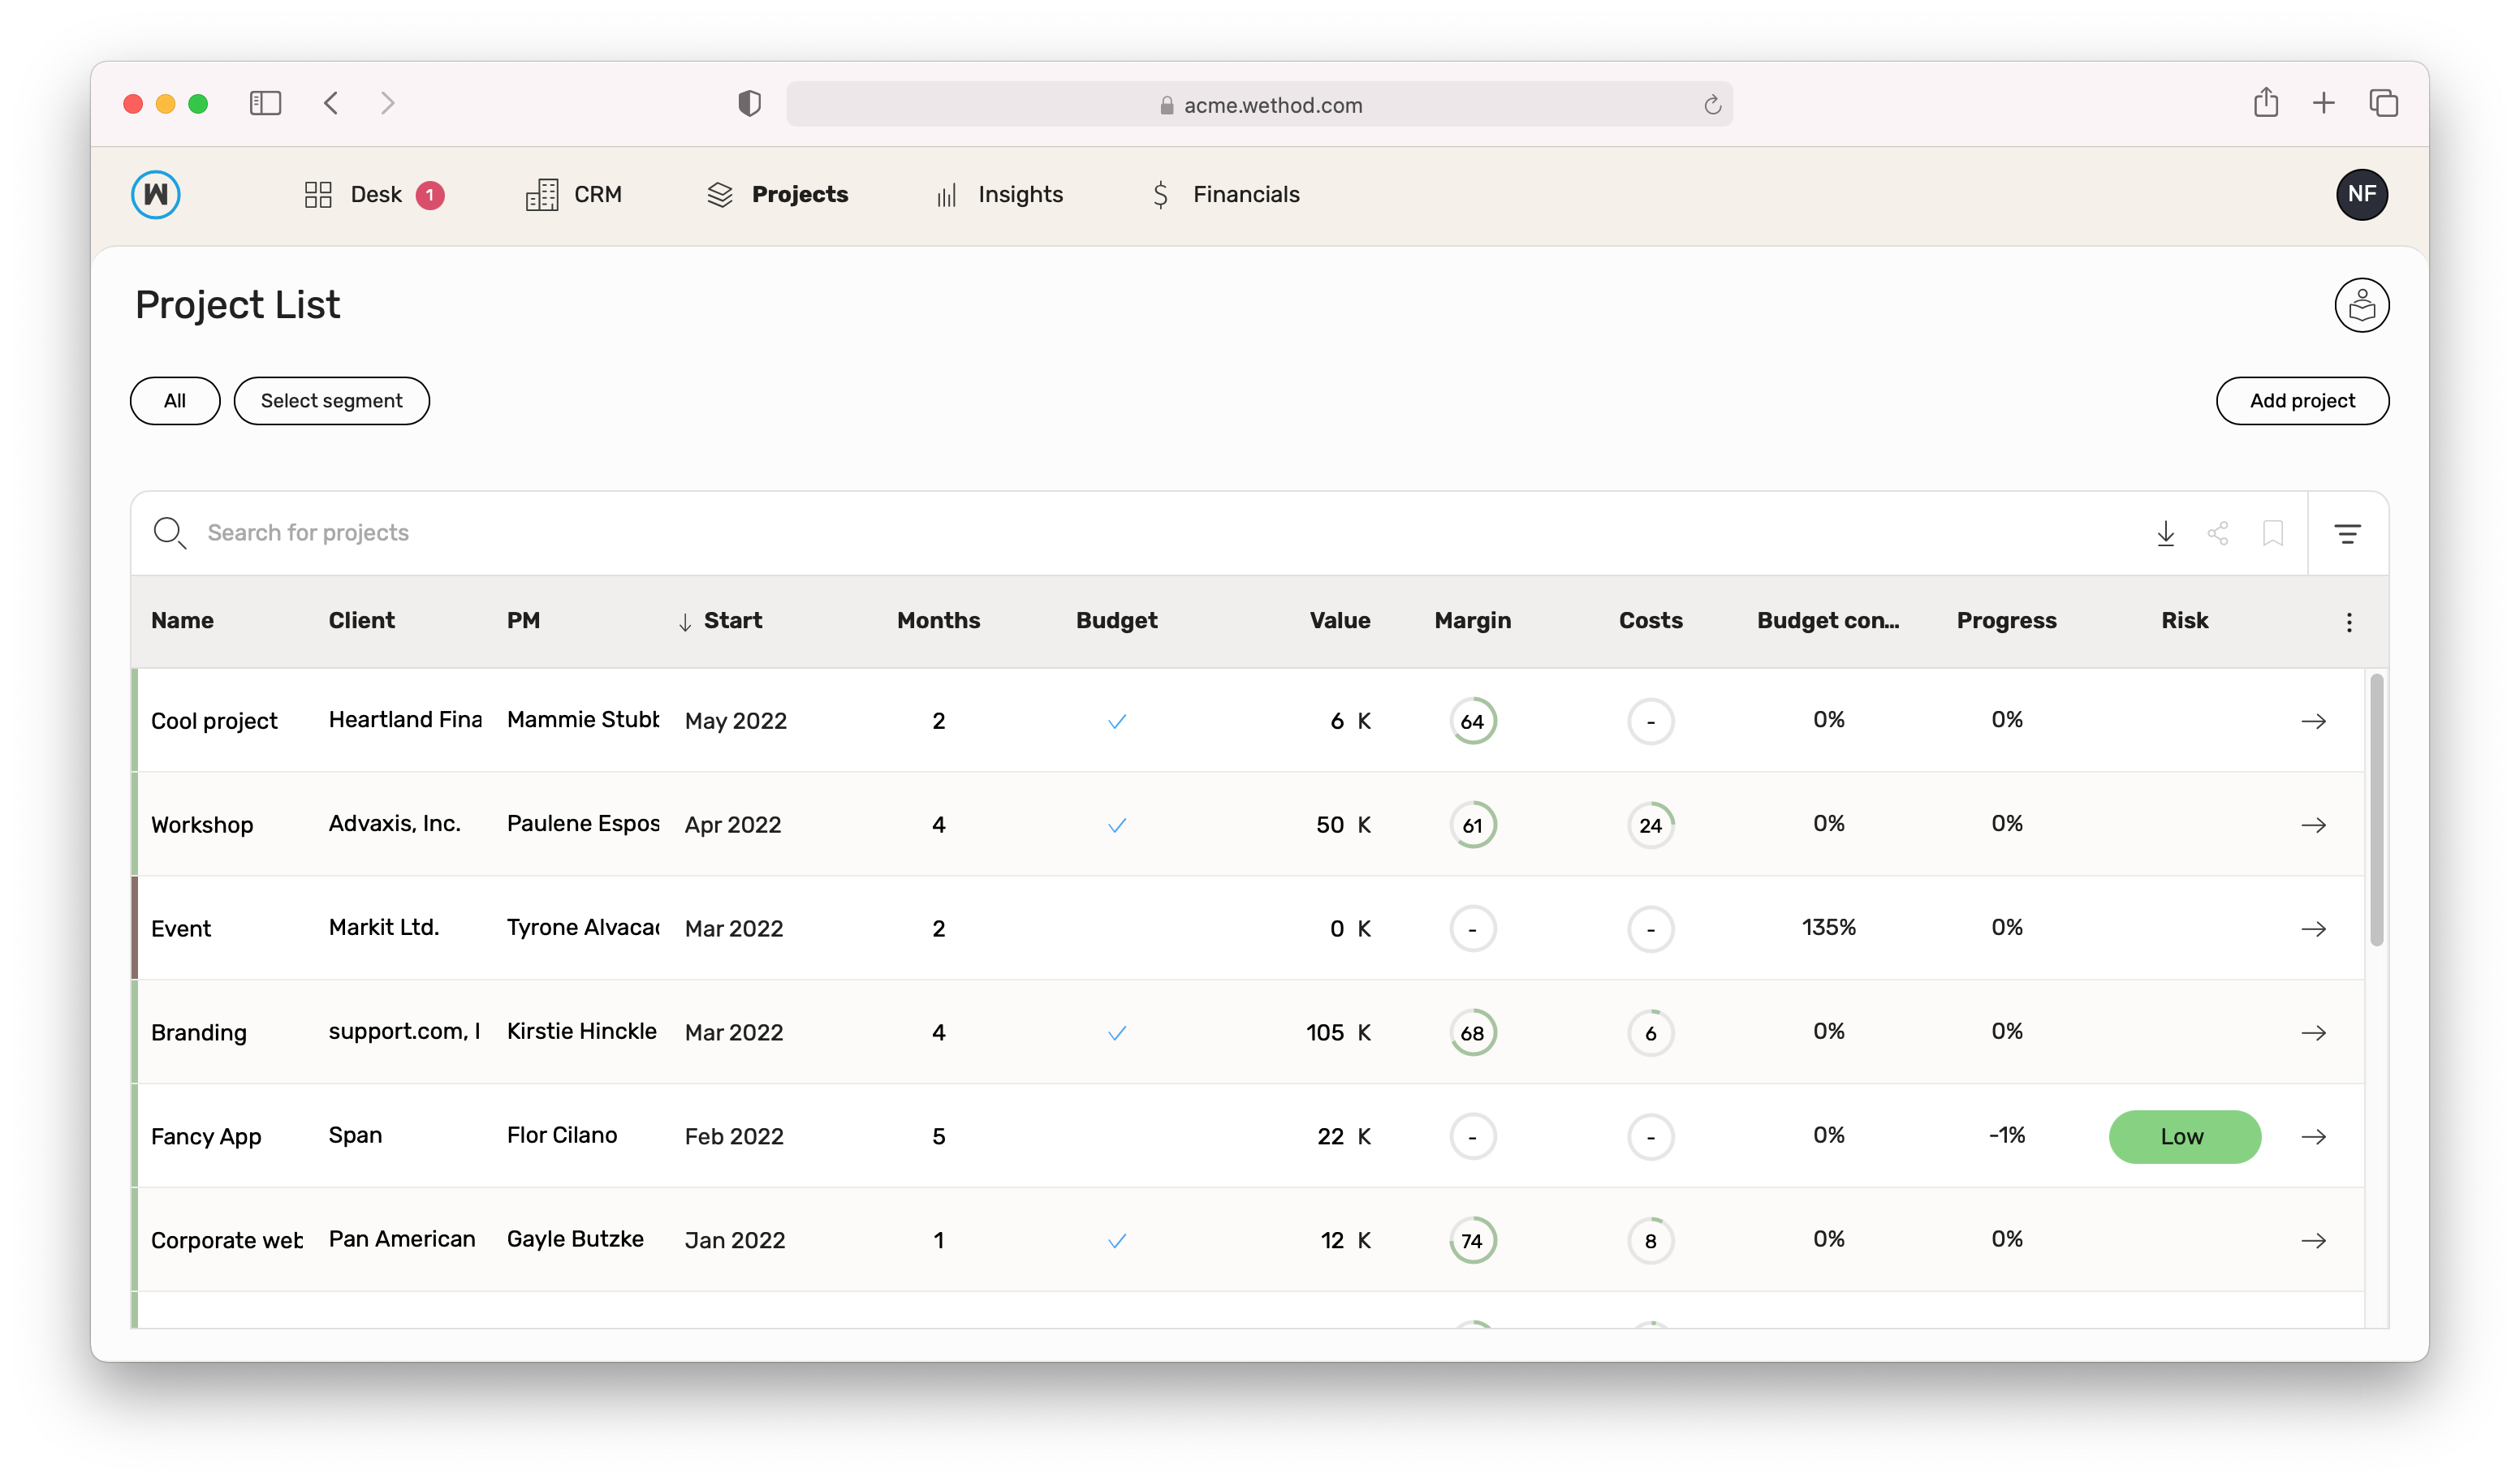
Projects
Click on the ‘Add project’ button in order to show the project sidebar.
Here you can enter all the available project information.
The suggested probability is 90%, and you can only choose a value between 90% and 100%.
When you filled in all the required info, you can click on the ‘Save’ button. Your new project will then be visible in the projects list.
Edit an activity
You can easily edit the visible information of an activity straight from the list. Just hover over the row you want to update, and click on the desired field. You can save the changes by clicking outside the field.
To edit all the information not visible at first sight, you can click on the activity details button.
From the sidebar, you can edit all the details at once, just remember to click the Save button when you’re done!
Useful links
You can browse all the main pages to quickly manage your project.
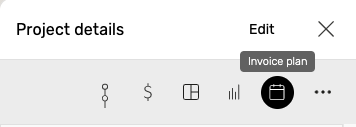
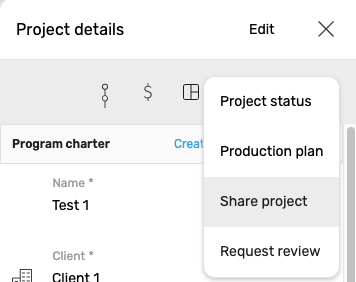
Just open the sidebar with the activity details, you will find a useful set of actions. All in one place!
This includes:
- Link to project sections (Project timeline, Budget, Project canvas, Project report, Invoice plan, Project status, Production plan)
- Share project to a colleague
- Request a review on the project
- Edit won/lost feedback
Archive
When a project has ended, for example because the progress reaches 100%, or if you are sure you can no longer sell it (so you set the probability to 0%) you can consider to archive it.
An archived project is considered no longer active. This prevent the users from doing a series of actions on it.
For example, you cannot add timesheet or edit the project status after you archive the project.
You also cannot edit some information, like its probability, risk or job order category.
In order to make this actions available again on an archived project, you can unarchive it any time.
To archive or unarchive a project, just open the sidebar with the activity details and click on the edit button. You will find the archiving button on the bottom of the details.
Please note that, in order to archive a project, this must comply to all the rules defined in the Rules section of your company.

Delete
If a project was added by mistake, you can choose to delete it.
To delete a project, just open the sidebar with the activity details and click on the edit button. You will find the delete button on the bottom of the details.
Please note that a project cannot be deleted if it already started producing value in your company. This means that if you already added timesheet or edited its project status, you will be no longer able to delete it. In that case, you can easily archive the project instead.

Segments
Users can save a custom group of filters to retrieve a specific set of data. A group of filters can be saved with a name and it’s called a segment. In practice, segments are “advanced searches” saved with a name that you can use whenever you want. Let’s say each Monday you want to see all opportunities of your main client “Acme”. You can filter all opportunities with client=Acme and save the search as a segment called “Acme opportunities”. Segments are unique per each section, that means for example they are not shared between pipeline opportunities and project list.
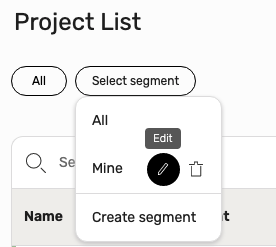
To create a segment:
- Click on “Create segment” inside segment select, a sidebar containing all the filters will open
- In sidebar, give a name to the new segment. This name must be unique between all your segments for this section.
- Choose all filters to combine in order to create the segment
- Click on save
- Once the segment is saved, the sidebar is automatically closed and the segment is applied
To edit a segment:
- Open segment select
- Click on the edit button that appear when you put the cursor over a segment name
To delete a segment:
- Open segment select
- Click on the delete button that appear when you put the cursor over a segment name
There are some default segments:
- All: no filter applied
- Current: activities not archived
- Archived: activities archived
- Mine: activities where the user is PM
- Others: activities where the user is not PM
If a segment is applied and you open the advanced search, the sidebar will be populated with the filters enabled in the active segment. When this filters are changed, the segment is disabled.
Default segments can be edited and deleted.
Selectable columns and ordering
You can select which columns should be shown and which have to be hidden using the column selector button.
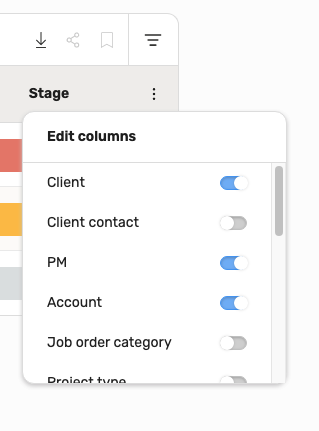
The set of columns is unique per user and per device. Each user on your company can choose to see a huge range of columns when browsing from their laptop and only focus on core information while checking Wethod on the go from their smartphones.
Almost all columns are sortable, exception made for Risk and Client Contact. Just click on the name of the attribute you wish to order your results by and Wethod will take care of rearranging your list.
A small arrow is shown beside the attribute’s name to show which columns is currently ordering the results and the ordering type (ascending or descending).
Search
Wethod offers you two ways to find your desired project or opportunity: the simple quick search and the advanced search. You can use just one of them or both together. A classic example of using the two search modes together is when you apply a segment to trim your list of results and then decide to further narrow down the list with a quick search on a specific client name.
Simple search
This is done straight from the main table, and you can just type something and we will show all results matching the search.
For example, the search “new pipeline rules” will return all projects/opportunities where one of the base search fields contains the word “new”, “pipeline” and “rules” so a project called “old pipeline” will not match but a project called “new rules” for a client named “pipeline” will match. Below you can find the list of attributes used by the simple search. Your keyword will be matched against the following:
- PM name and surname
- Account name and surname
- Client name
- Project name
- Project job order
- Job order category name

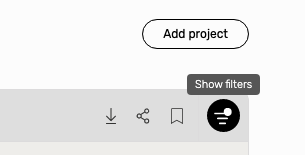
The search bar used for basic search also shows other three actions:
- Export: A complete list of all projects/opportunities is sent to your mailbox. This export is going to ignore all filters and
- Share: share the current search by sending it by email to a teammate or by copying it. The current search is available as a URL containing all the applied filters and simple search terms.
- Save: save the current search in your Desk pinboard. The current search is available as a URL containing all the applied filters and simple search terms.
Advanced Search
The advanced search sidebar can be accessed clicking on the “Show filters” button in the simple search bar.
Filters are combined using AND logic which means the results consider all of them at the same time. Selections belonging to each filter are combined using OR logic. For example if you filter all projects with budget status missing, draft you obtain all activities with a budget that is either missing or in draft status.
You can search for a specific filter using the filters search bar at the top. Additionally you can clear all applied filters by pressing the “clear all filters” button above it. If you have a segment applied, all filters that are part of the segment will be shown when you open the advanced search sidebar. Please mind that changing the list of filters is not going to be saved to the segment unless you had clicked on the “edit segment” button. Visit the segment support section for further information.

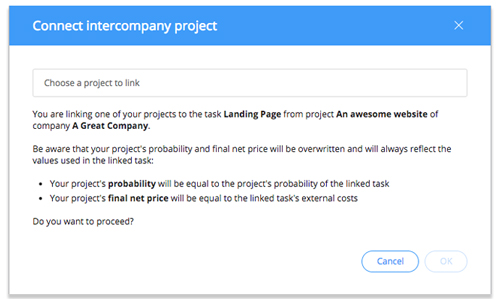
Intercompany Projects
If your company is part of a group you have the possibility to connect a project to an intercompany task, this makes it an intercompany project: its final net price and probability are updated to reflect the intercompany task’s external costs and intercompany task’s project’s probability.
To connect a project you must first be invited, this can be done from inside a budget as explained here. When you receive the invitation, just follow the link and select from the dropdown the project you want to connect.
Successfully connected projects are identified by a label below their names.

Won/lost feedback
Wouldn’t be great to be able to collect feedback about the reasons that led to win or lose a project?
In the company section you can configure a set of reasons that project managers can use to describe why a project’s probability went up to 90 (so the project was won) or down to 0 (so the project was lost).
When you enable the related flag for a job order category, the user will be asked for a feedback each time a project in that category gets won or lost.
Invoice Plan
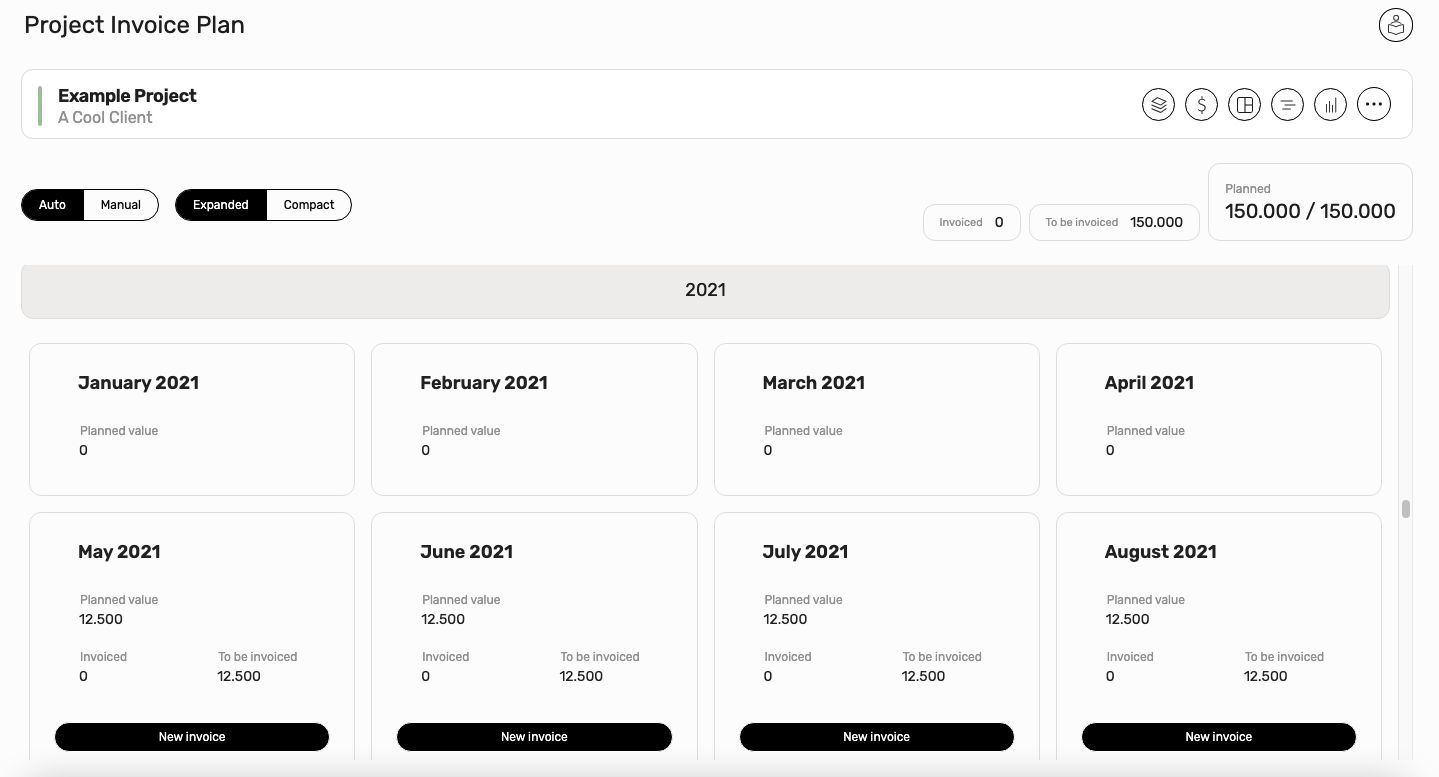
Here you can set a plan to emit invoices for the project. An invoice plan can be:
- Automatic: an invoice is automatically planned for each project’s duration month, the invoice amount is obtained by dividing project’s estimate by project’s duration;
- Manual: you need to manually insert each amount you plan to invoice.
Next to the automatic/manual button you will find the view selector with 2 different options:
- Expanded: All months are shown, even those with no amount planned or invoiced.
- Compact: Only months with planned amounts or invoices are shown.
On the right side you have a recap of the total amounts you have currently invoiced, have yet to invoice and the sum of your plan amounts.
The planned indicator helps your check that the sum of all your planned months matches the project’s estimate.
An error with additional information appears beneath it if the two mismatch.
Just below you can find a calendar where every card represents a month with some additional information:
- Planned: the amount you plan to invoice for the given month;
- Invoiced: the amount actually invoiced for the given month. This is automatically updated each time you create an invoice for the project;
- To be invoiced: the difference between Planned and Invoiced for the given month.
- While in manual mode you can also add notes to a month through the notes button in the top right corner of the card.
You can create new invoices directly from the Invoice Plan by clicking the New Invoice button available in each month’s card. When you create an invoice from here, the notes for that month will be pre-filled in the invoice automatically.
When in manual mode the invoice plan is saved automatically after every change.
Please mind the sum of each planned month must be equal to the total planned value shown in the top right corner.
If the values do no match the invoice plan won’t be saved and an error message will appear warning you about the difference between the project’s estimate and the amount you planned.
You can find the invoices (listed in your plan) in the Invoices widget, there they’re ready to be created and sent.
Billing group
Sometimes you want to link several projects together and handle the invoice plan from a single central project.
This can be done using a billing group.
To create a new billing group visit the invoice plan of a project you wish to link and click on the “Delegate invoice plan” button.
Now select a project that will be used as the billing group master. Please mind that not all projects can be added to a billing group, in fact to be part of a billing group a project must:
- Not be “Invoice Driven”: The project job order category should not be marked as “Invoice driven budget”.
- Not have any invoices.
- Not have a multicurrency budget. At the moment we only support projects using the master currency.
- Not be archived.
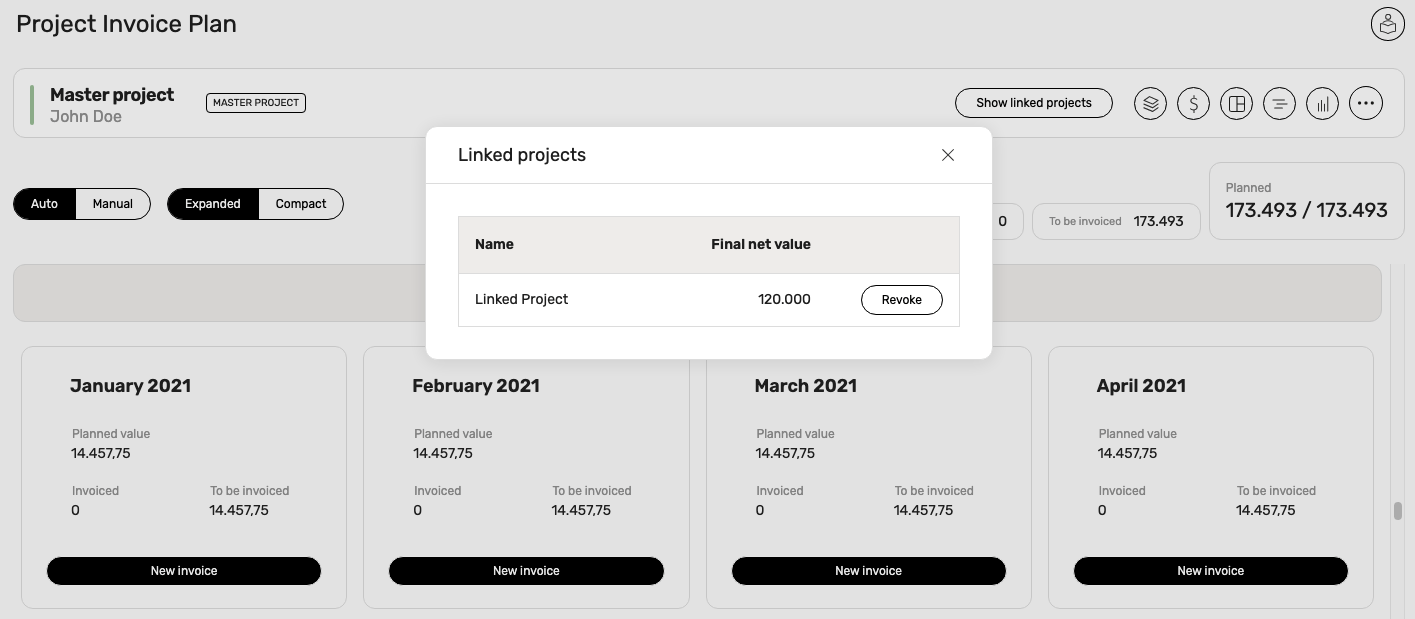
Once your new billing group is created you can access the group invoice plan from the master project invoice plan page.
The invoice plan total it’s made by the sum of all projects totals and you should plan accordingly.
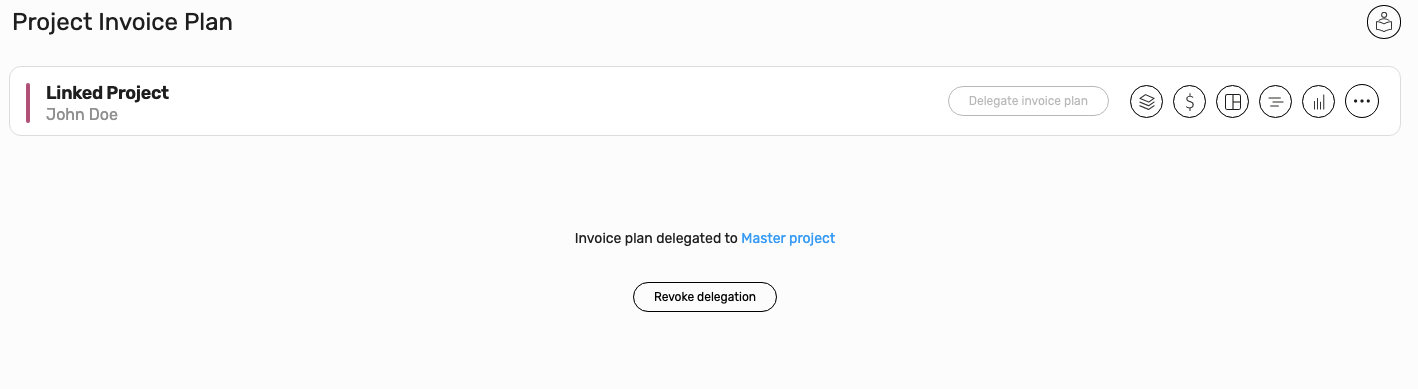
Trying to access the invoice plan of a linked project will result in an error since now every operations should be performed from the master project.
For example if you wish to generate a new invoice for a project that is part of a group you have to assign the invoice to the master project.
If you wish to unlink a project from a group you can either:
- Access the master project invoice plan -> click on the “Show linked projects” button -> Click on the “unlink” button next to the name of the project you wish to unlink.
- Access the linked project invoice plan -> Click on the “Revoke delegation” button.
Beware that since you have removed a project from the group the total will change.
If you master invoice plan was set on “manual” mode you will have to adjust your plan to reflect the changes.
Programs
Projects are often stages or parts of something bigger, you can use a Program to group together different projects in order to see their aggregate economic reports
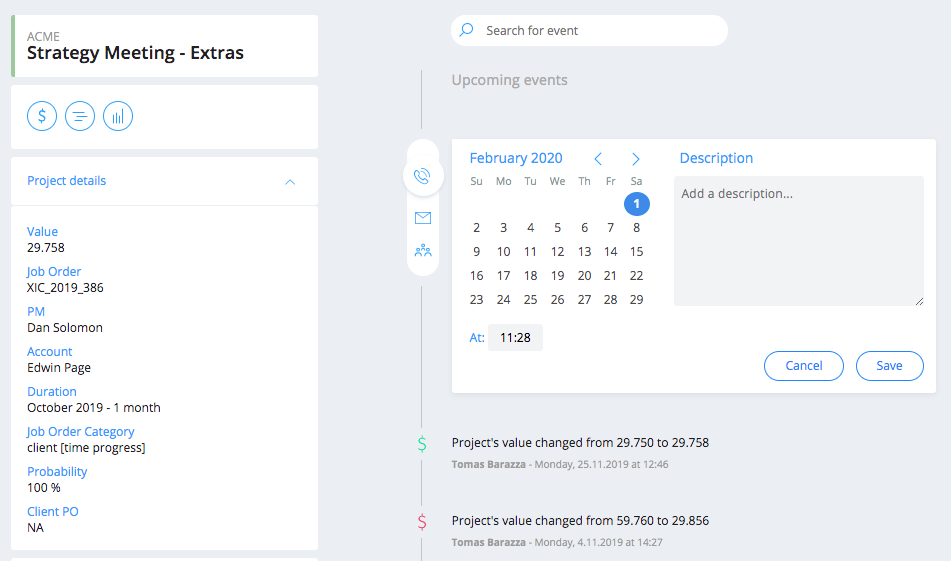
Timeline
Sometimes managing your customers’ relationships can be difficult and you can easily get lost. With the timeline you can keep all your customer relationship’s history and everyone in your team can access it.
You can reach a project’s timeline from the pipeline: choose a project, click on it and look for the timeline button in the bottom-right corner.
Add activities you think are important to remember like calls, emails and meetings. To every added activity you can link a follow-up which is nothing more than another event. A follow-up is usually settled in the future, so you can think of it as a sort of reminder.
The timeline gets automatically populated with some useful project’s events like the creation of an order or invoice, the changes to the project value and margin, the project’s first project status and a lot more.
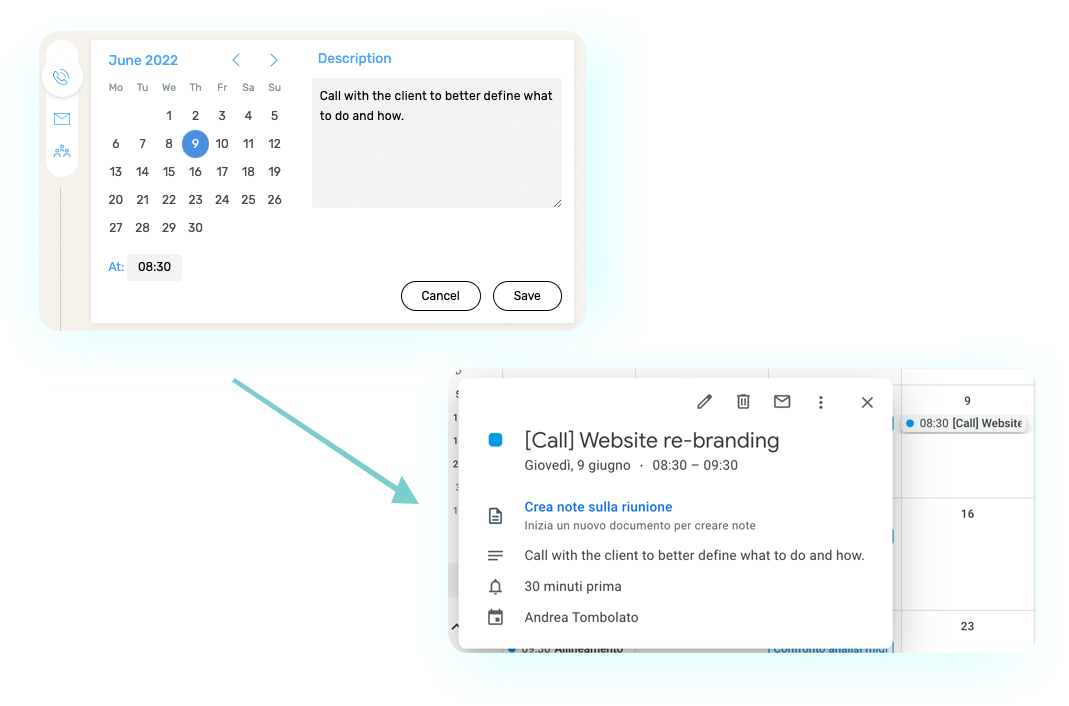
Sync with your Google Calendar
Activities which you create inside a project timeline can be added to your Google Calendar and kept in sync. This sync id one way from Wethod to Google Calendar, this means that if you edit or delete an event in your Google Calendar these changes are not propagated to Wethod.
You can enable this functionality in the account section.
Project Plan
The Project Plan is designed for those who want to manage projects in a visual, simple, and structured way.
It allows you to plan tasks, timelines, assignments, and dependencies in an immediate way
But it’s not just a basic task manager: the Project Plan integrates directly with the budget and People Allocation, ensuring that each task is effectively planned in line with available resources, capacity, and financial constraints.
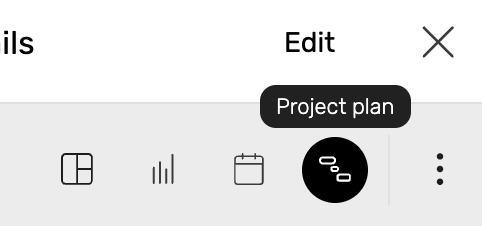
From the project list, open the relevant project and check the side panel. Here, you’ll find the icon to access the Project Plan.
A window with two options will immediately appear:
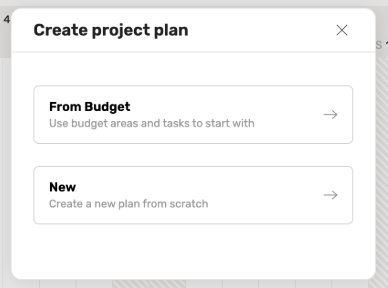
- **From Budget: **already have a well-structured budget? Great—start from there and import the areas and tasks you’ve already defined.
- New: prefer to start from scratch with full creative freedom.
💡 Expert tip: if your budget is well structured, choose the first option. You’ll save valuable time and keep everything aligned.
The Structure
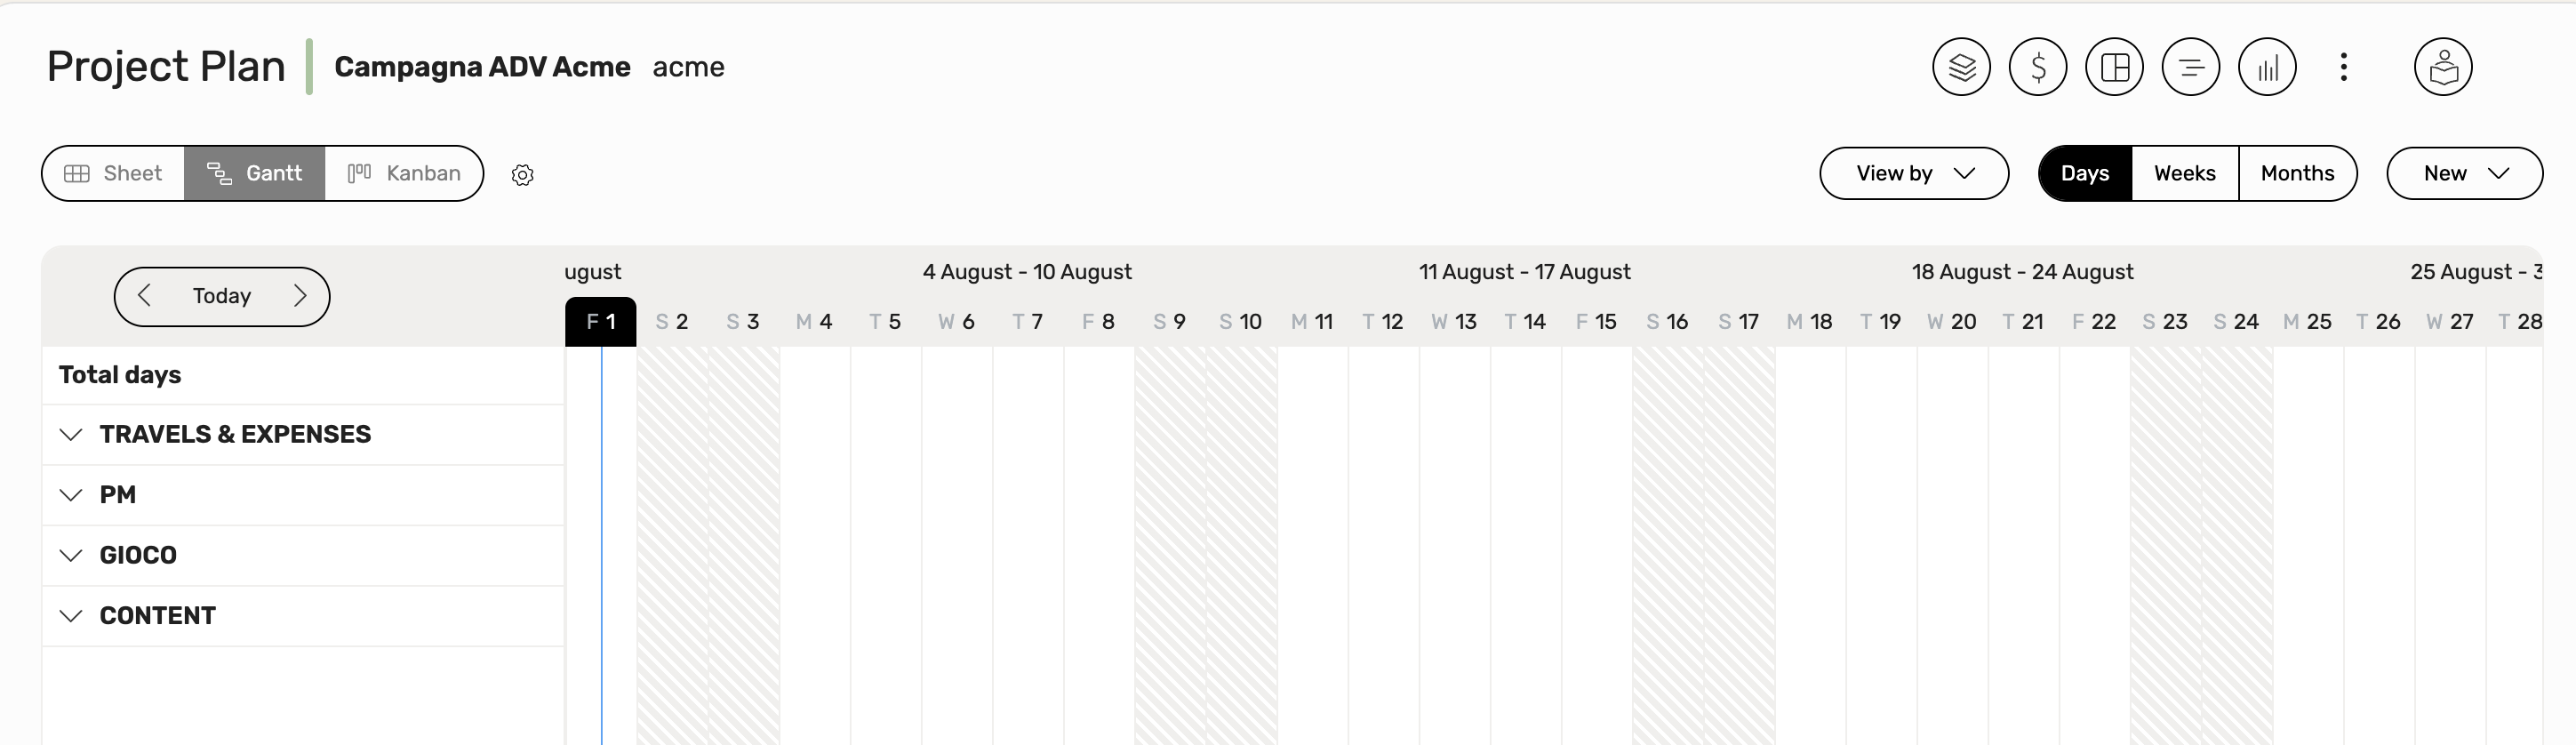
Once the plan is created, you can define its structure through a Gantt view (Sheet and Kanban views coming soon).
If you imported the plan “From budget”, all areas and tasks are generated automatically.
If you selected “New,” you can build the plan manually by entering the project phases yourself.
The hierarchy is simple and follows three levels:
- BUDGET AREAS (uppercase and clearly visible): match the budget areas (if imported);
- TASKS (actual work to be done): activities defined in the budget or manually added;
- **SUBTASKS **(smaller, more detailed actions): used to break tasks down further.
💡 Smart note: if a task has scheduled subtasks, it becomes a summary container and loses its own individual scheduling. The subtasks handle all planning.
By enabling the “Budget days always on” option (via the gear icon), you’ll see two values next to each area or task: Assigned hours (manually entered on the task) / Budgeted hours (estimated in the budget)
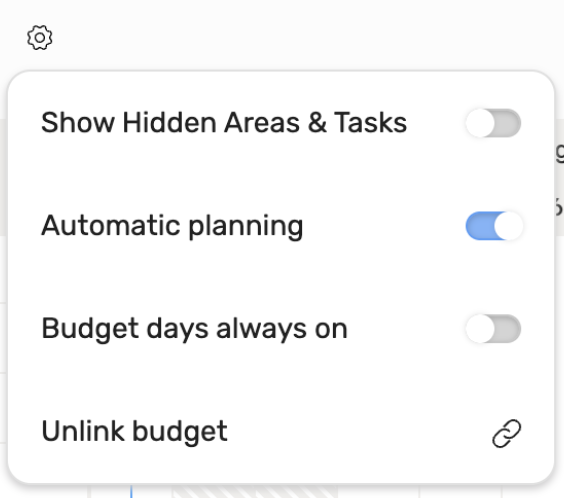
This allows you to constantly track time allocation against the budget.
The Workflow
To start concretely, click on any task or subtask: a side drawer will open, allowing you to manage key planning elements. Within the drawer, you can:
📅 **Set start and end dates **Define when the activity starts and ends so it’s correctly positioned in the Gantt.
🚦Assign a status Each task can have a status indicating its progress. The color will reflect in the Gantt when using the “View by status” option:
- ⬜ Not started
- 🟨 In progress
- 🟥 Blocked
- 🟩 Completed
- ⬜ Closed
🔗 Set dependencies between tasks Not all activities start simultaneously—some depend on others. You can define these dependencies in the Project Plan, visualized via arrows in the Gantt.
To set a dependency:
- Open the task/subtask drawer
- In the “Depending on” section, select the relevant task
- Specify the dependency type
⚠️ If the plan is inconsistent, the system flags it and offers two quick fixes:
- Adjust dependency – automatically updates dates to resolve the issue
- Remove dependency

💡Example: if the subtask “ui” depends on “ux” with a “Finish to start” logic, but starts earlier in the Gantt, the system shows a warning and offers actions to fix it.
📝 Add notes Use this space to describe the task, provide guidelines, or share references with colleagues.
👥 Assign one or more people Choose who is responsible for a task (Assignee) and how many days are required.
- Click “Add assignee”, select team members, and define the effort.
- The task will appear in their Desk and, if enabled, in People Allocation via Automatic Planning.
Planning Options
You can choose whether to let the system manage resource allocation or do it manually:
🔔 **Automatic Planning ON (recommended):**The system places the task in the person’s People Allocation schedule, checking availability, budget, and planning rules. Alerts will highlight any issues. 🔕 Automatic Planning OFF: The task is assigned but not automatically scheduled. You’ll need to handle planning manually. A popup will remind you when this is off.
If Automatic Planning is active, you can choose between two scheduling modes:
🚀 “Plan as soon as possible”: assigns the task to the first available days within the defined period. 🗓️ “Distribute the task”: evenly spreads the effort across the entire task duration.
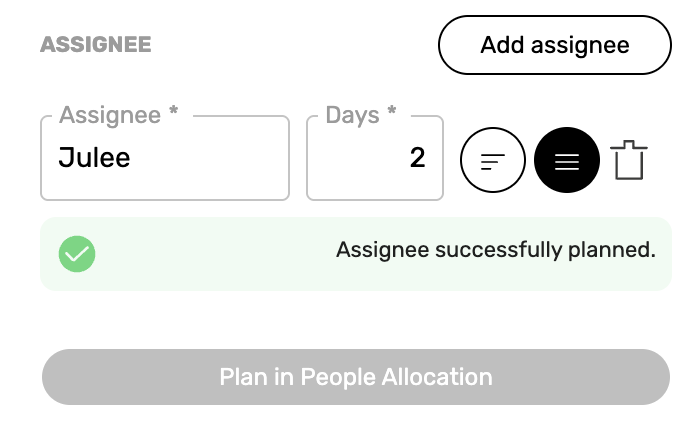
Clicking the Button “Plan in People Allocation” adds the task to the person’s planning.
✅ Tip: automatic assignment in People Allocation is one of the smartest and strictest features of the Project Plan. Choose assignees carefully to benefit from real-time checks. You can always switch to manual planning if needed.
Automatic Planning
When “Automatic Planning” is on, when you assign a person to a task, wethod checks their availability. If there’s a conflict, it warns you.
Type of Alerts and Suggestions
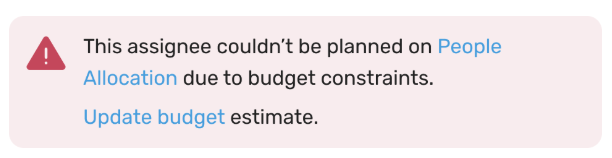
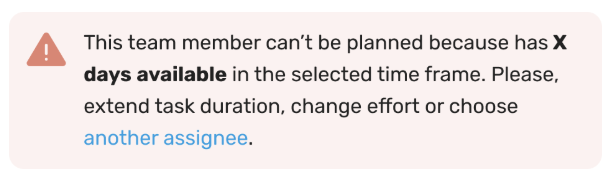
🔺 Red triangle (Critical)
No budget capacity available for the person’s level. 💡 Solution: change assignee, adjust seniority level, or update the budget.
🟠 Orange triangle (Time issue)
The person doesn’t have enough time available during that period. 💡 Solution: reduce required effort, move the task, or reassign it.
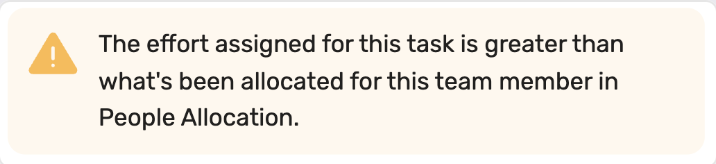
🟡 Yellow triangle (Inconsistency)
Mismatch between the project plan and the assignee’s personal planning. 💡 Solution: click “Plan in People Allocation” to resolve.
🔵 Blue lightbulb (Opportunity)
Good news! There’s availability to finish the task earlier than expected. 💡 Solution: you can bring the task forward to optimize time and resources.

Views
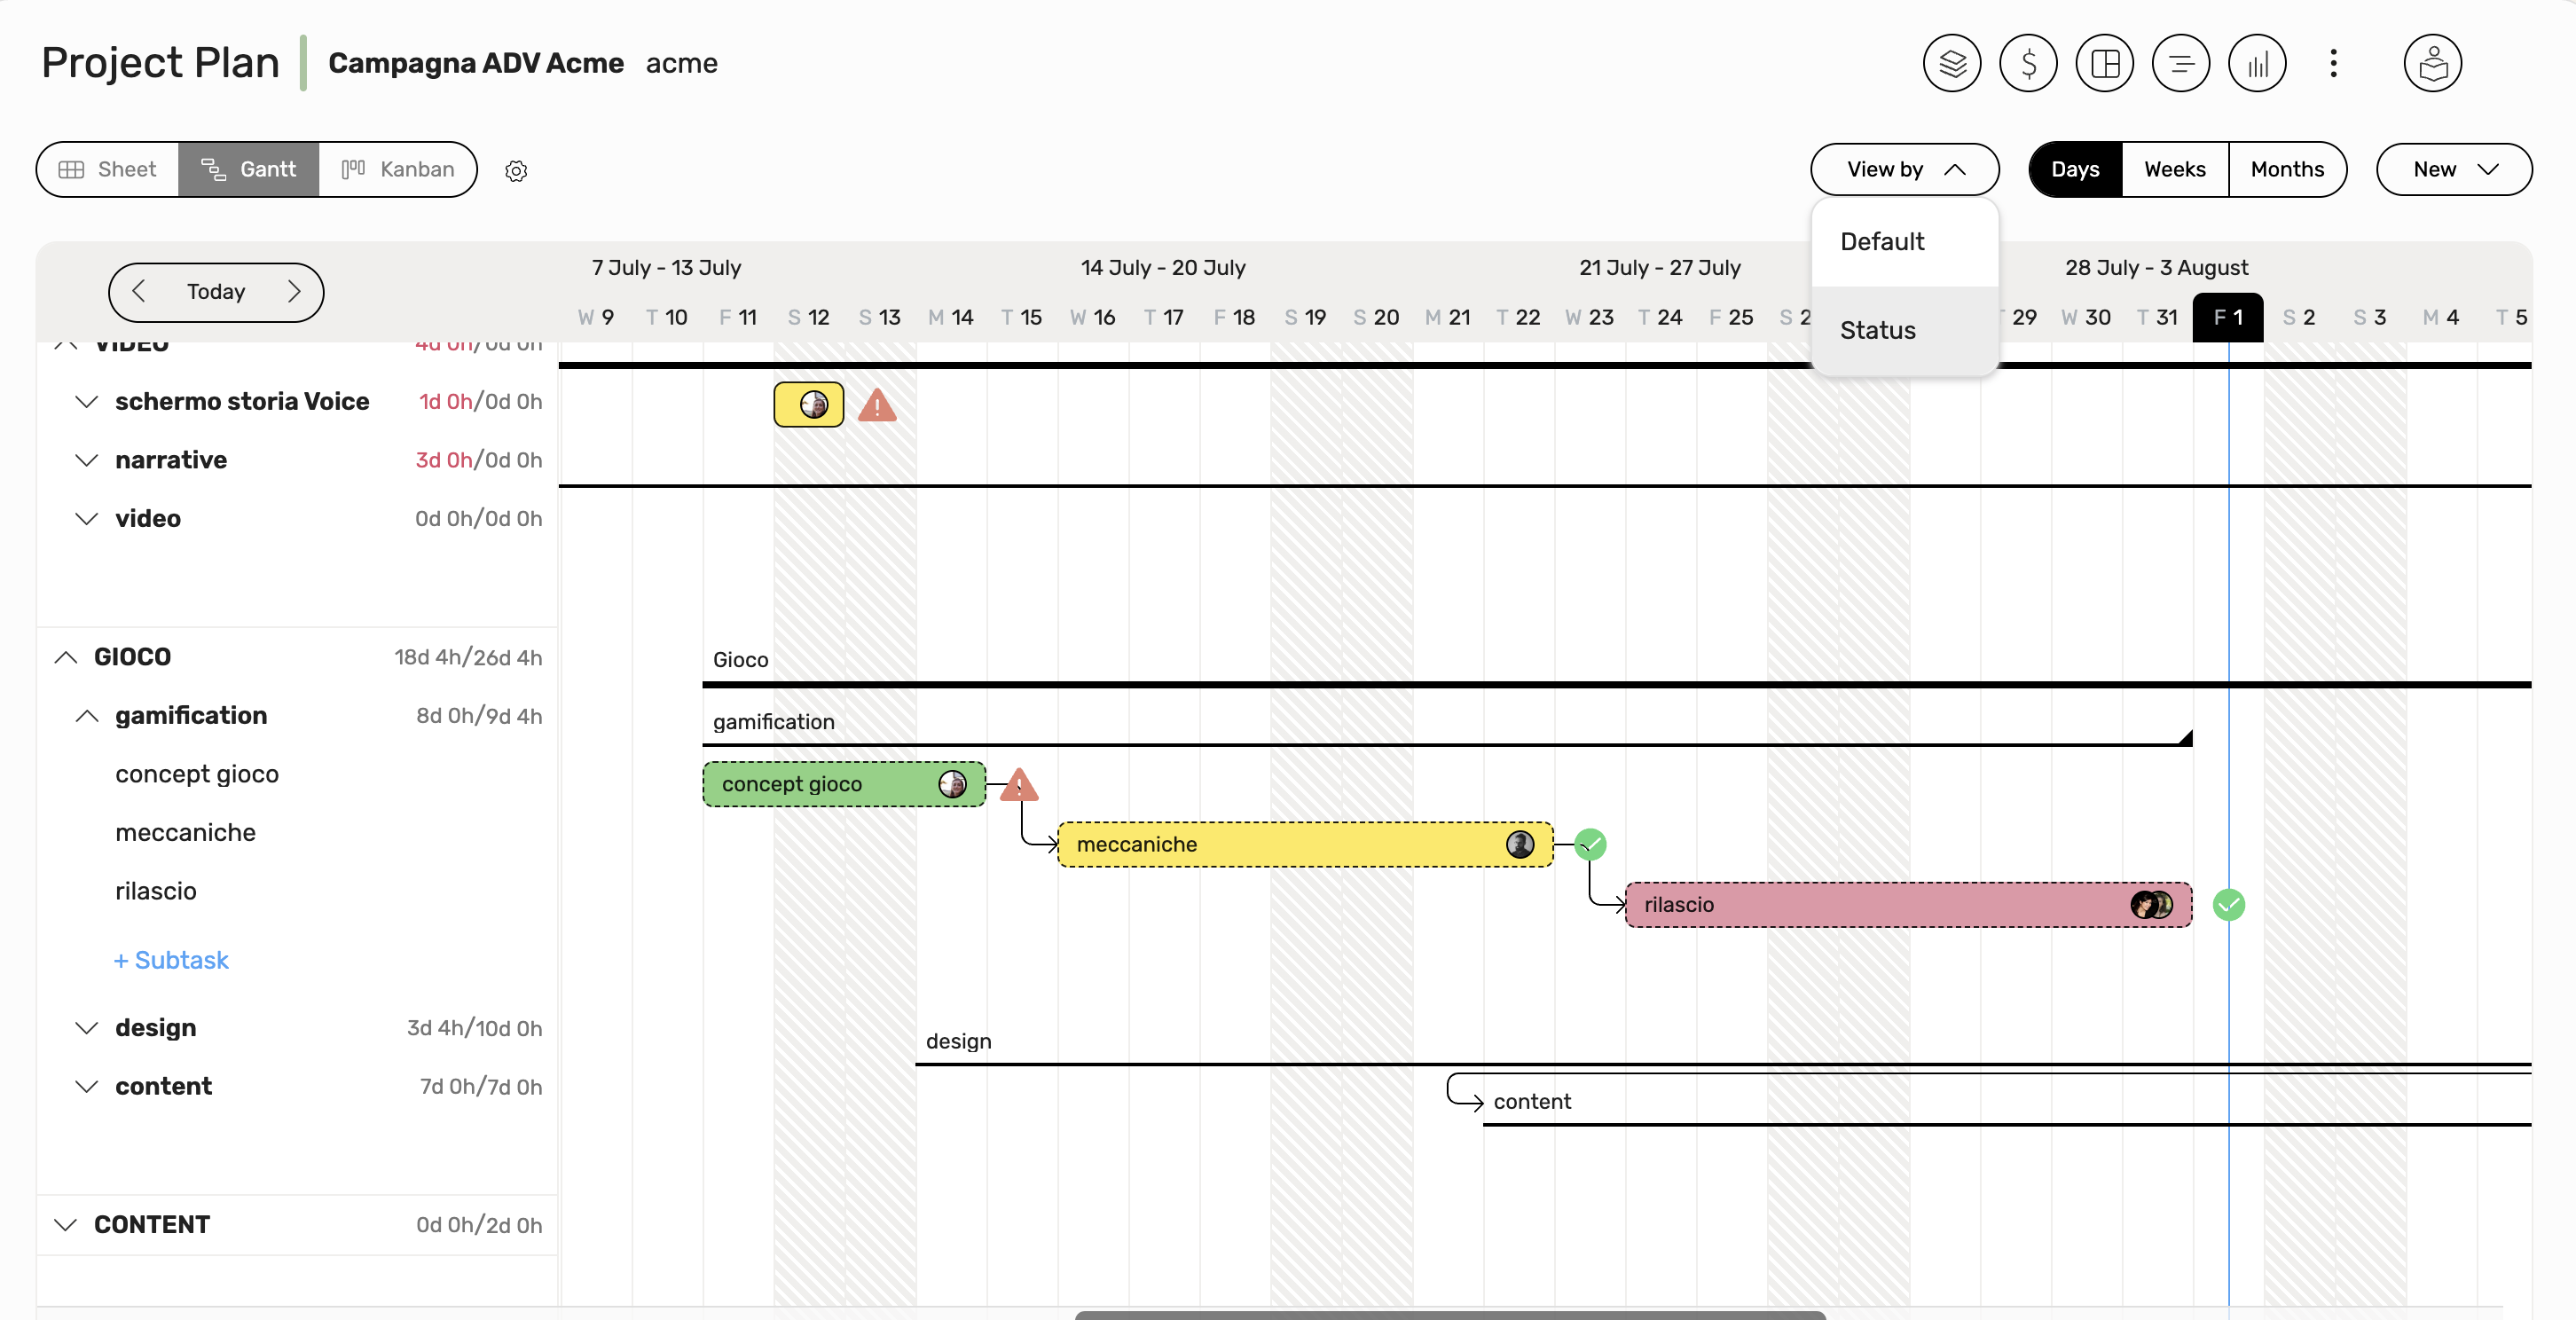
Gantt
The Gantt is not just a timeline—it’s an interactive and customizable tool that helps you track progress and intervene where needed.
View by
Located at the top right, the “View by” menu lets you switch display modes:
- Default: classic view with tasks and assignees. Great for a clean, operational overview.
- Status: colors tasks and subtasks based on their current status (Not Started, In Progress, Blocked, Completed, Closed). 💡 This allows you to quickly spot progress and issues—supporting faster, data-driven decisions.
Drag and drop tasks directly in the Gantt
Tasks and subtasks are draggable. You can move them to change their start/end dates visually. Be cautious: wethod checks if the new dates align with actual resource planning.
⚠️ A yellow triangle will appear if there’s a mismatch.
🔧 How to fix it? Open the drawer and click “Plan in People Allocation” to update the person’s planning based on the new dates.
✅ Once aligned, a green check confirms the task is correctly scheduled in both the Gantt and People Allocation.
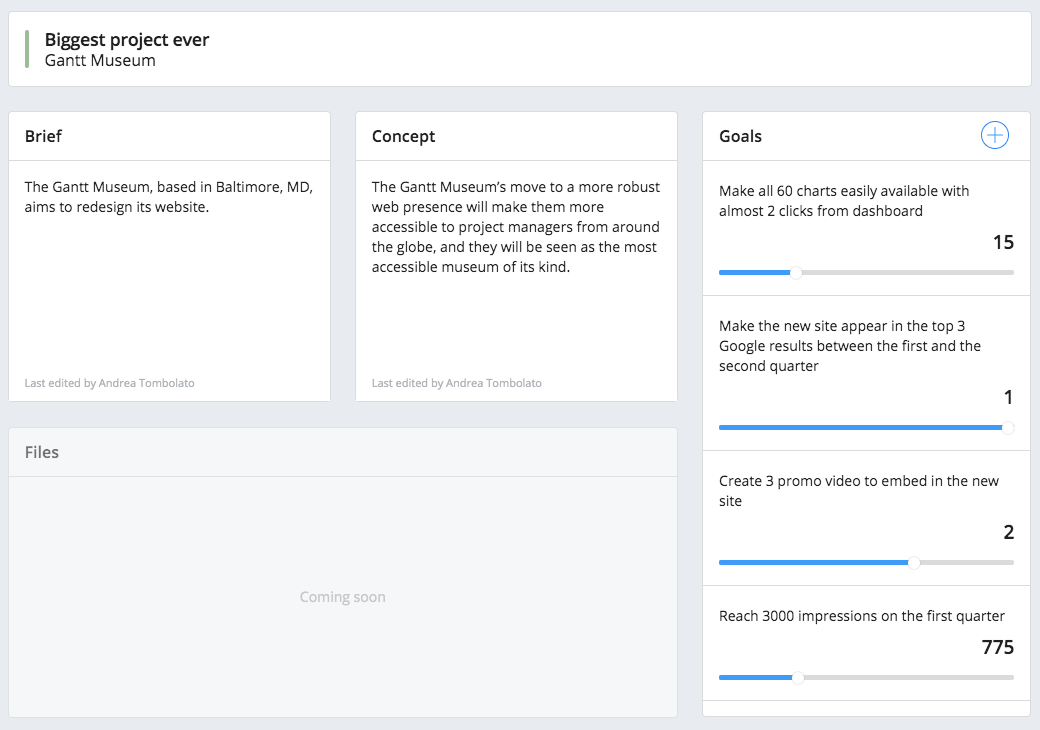
Project Canvas
To work well and efficiently on a project you first need to understand it and then highlight its main aspects. In WETHOD you can start “drawing” your project since its first stages by defining:
- A brief which explains what are the client’s needs
- A concepts which tells how you are going to answer the client’s needs
- Some goals that define some key metrics to measure project’s success (mostly deriving from client’s satisfaction)
- Files about your project (like documents or presentations) that you want to store and share with your team
- A set of boards to help you manage things to do
You can access this section from projects and basically everywhere you can see the canvas icon:
![]()
Hit the button from the menu of actions available on the top bar to start a Project & Team Review:

There is a dedicated widget to appreciate the average Kudos (points coming from reviews of a project):
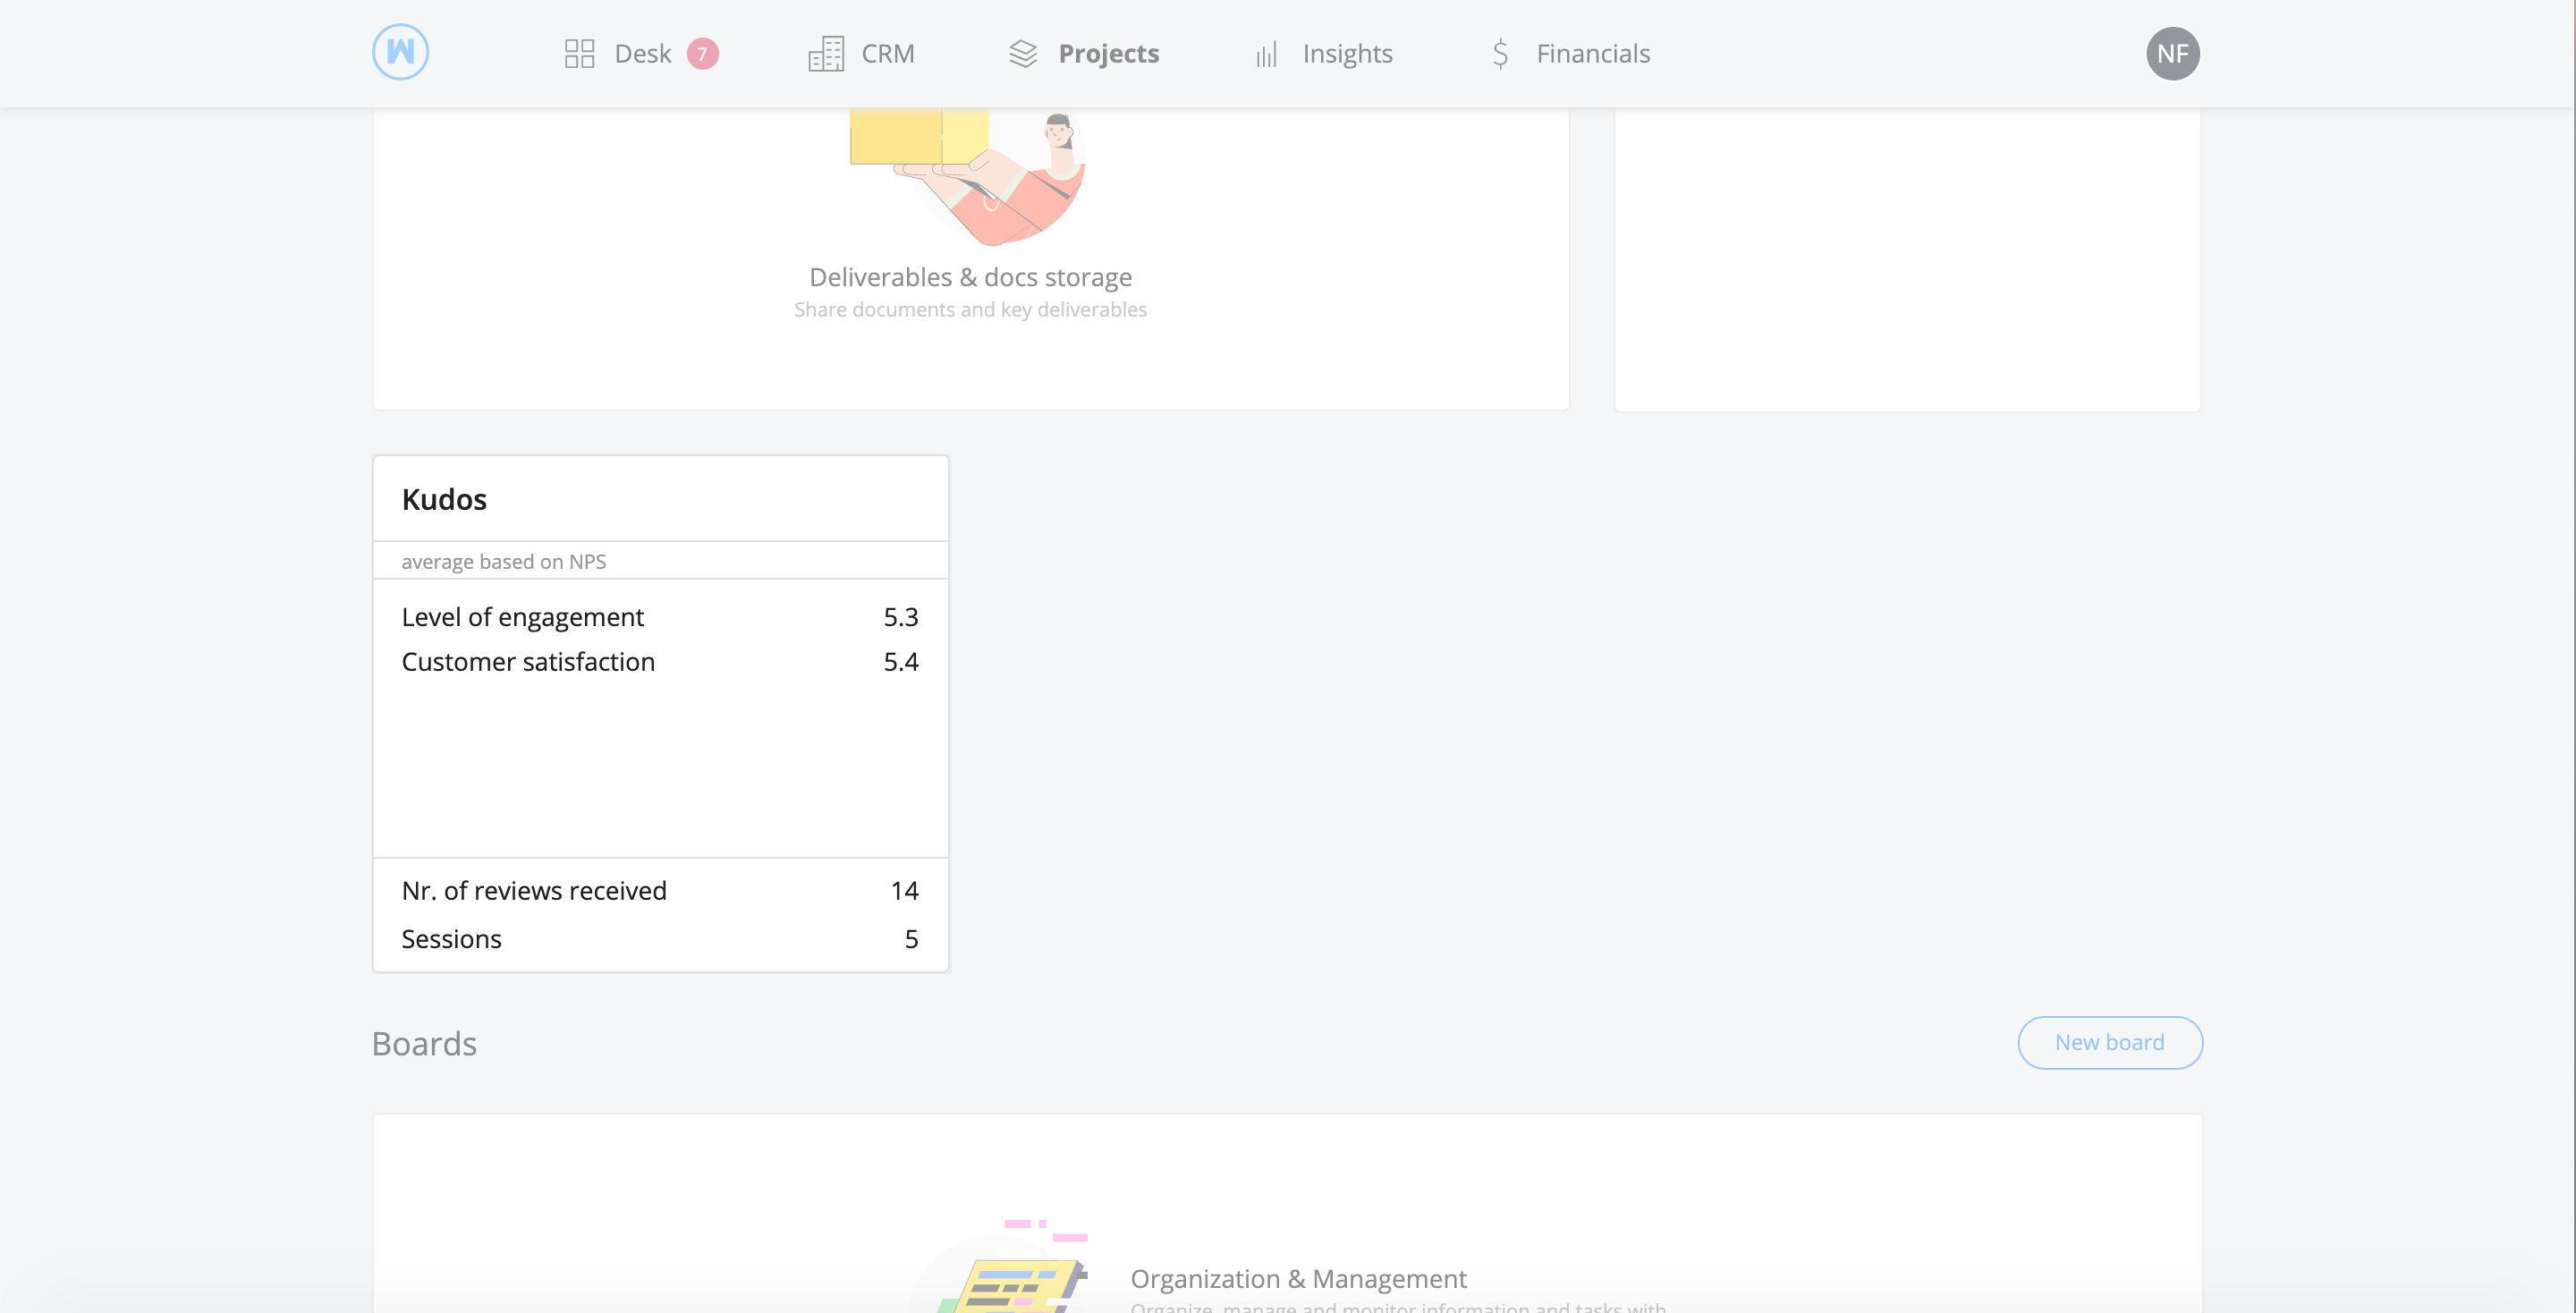
Files
This is your storage for the project: it’s a good idea to keep all assets for a project in a single place, so they can be easily found and used by all of your team members.
Sync with Google Drive
You can create a bridge between a project canvas and a Google Drive folder containing files related to that project.
This allow you to use canvas Files widget to:
- Upload files to the related Google Drive project folder. Files are uploaded inside the folder you are in
- See files inside the Google Drive project folder
- Delete files inside the Google Drive project folder
- Search files inside the Google Drive project folder. Search is done only inside the folder you are in
Once this functionality is enabled you will only be able to upload files to Google Drive, other files uploaded to wethod in the past will still be visible.
You can enable this functionality in your company settings.
Once this functionality is enabled, different thing are automatically kept in sync:
- When a project with a job order category in sync is created, the related Google Drive folder is created in the canonical path
- If a project client is changed, its Google Drive folder is moved under the new Google Drive client folder
- If a project client name changes, the Google Drive folder related to this client has its name changed accordingly
- If a project name changes, its Google Drive folder name is updated accordingly
- If a project client is deleted - and it gets replaced with another one for the active projects - all its Google project folders are moved under the new Google Drive client folder
A project may not be associated with a Google Drive folder, even if is the integration is enabled for its job order category. This can happen if:
- The project was created before enabling the integration
- Something in the canonical path has been deleted or moved
In these cases you get an error status but don’t worry, you can easily solve the issue by hitting the “Sync folder” button: wethod will try to find the Google project folder in the canonical path. If the folder cannot be found, a modal will ask if you want to create it.
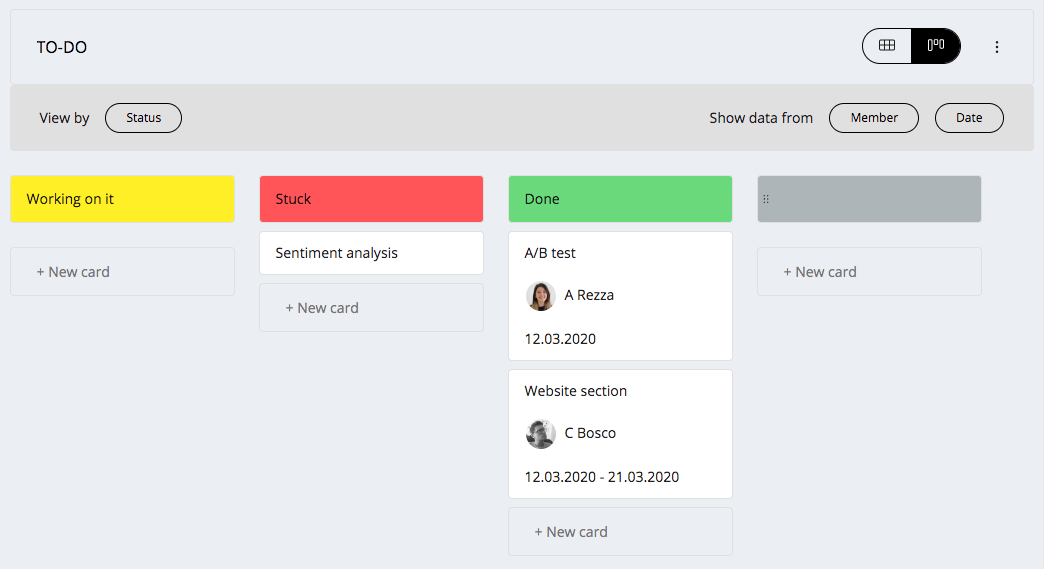
Boards
A board takes the form of a simplified spreadsheet where you can add and re-order columns and rows.
Columns comes in different types:
- Text
- Number
- Status which is basically a label with a color (don’t like the default ones? Edit them!)
- Date which let you choose a single date or a period
- Member which let you choose one or more employees from your company
- Milestone which let you add an important event, with a type and a date
When you add a column of type status or number you automatically get a summary below the column, for a number column you can choose which kind of summary you want to see: sum, average, min or max.
You can re-order columns, rows and boards by simply drag and drop them where you prefer.
Kanban
Do you hate tables? Ya they’re not this kind of friendly, so what about organizing all your tasks into cards that you can move from a list to another? You can do this by switching your view from spreadsheet to kanban: your table will be transformed into a list and no row will be harmed.
Lists are automagically created by pivoting all spreadsheet’s rows on the first column of type status but don’t worry, you can always usa another column of type status.
To see and edit details of a card just click on it.
You can re-order cards and lists by simply drag and drop them where you prefer.
Gantt
Start looking at your tasks from a different point of view: all date and milestone columns are showed on the Gantt, this means that from here you can appreciate how all your tasks fit together.
To see and edit details of an item just click on its name.
What you can do from here:
- Move dates and milestones by dragging them where you prefer
- Change a date’s start or duration by stretch or extend them
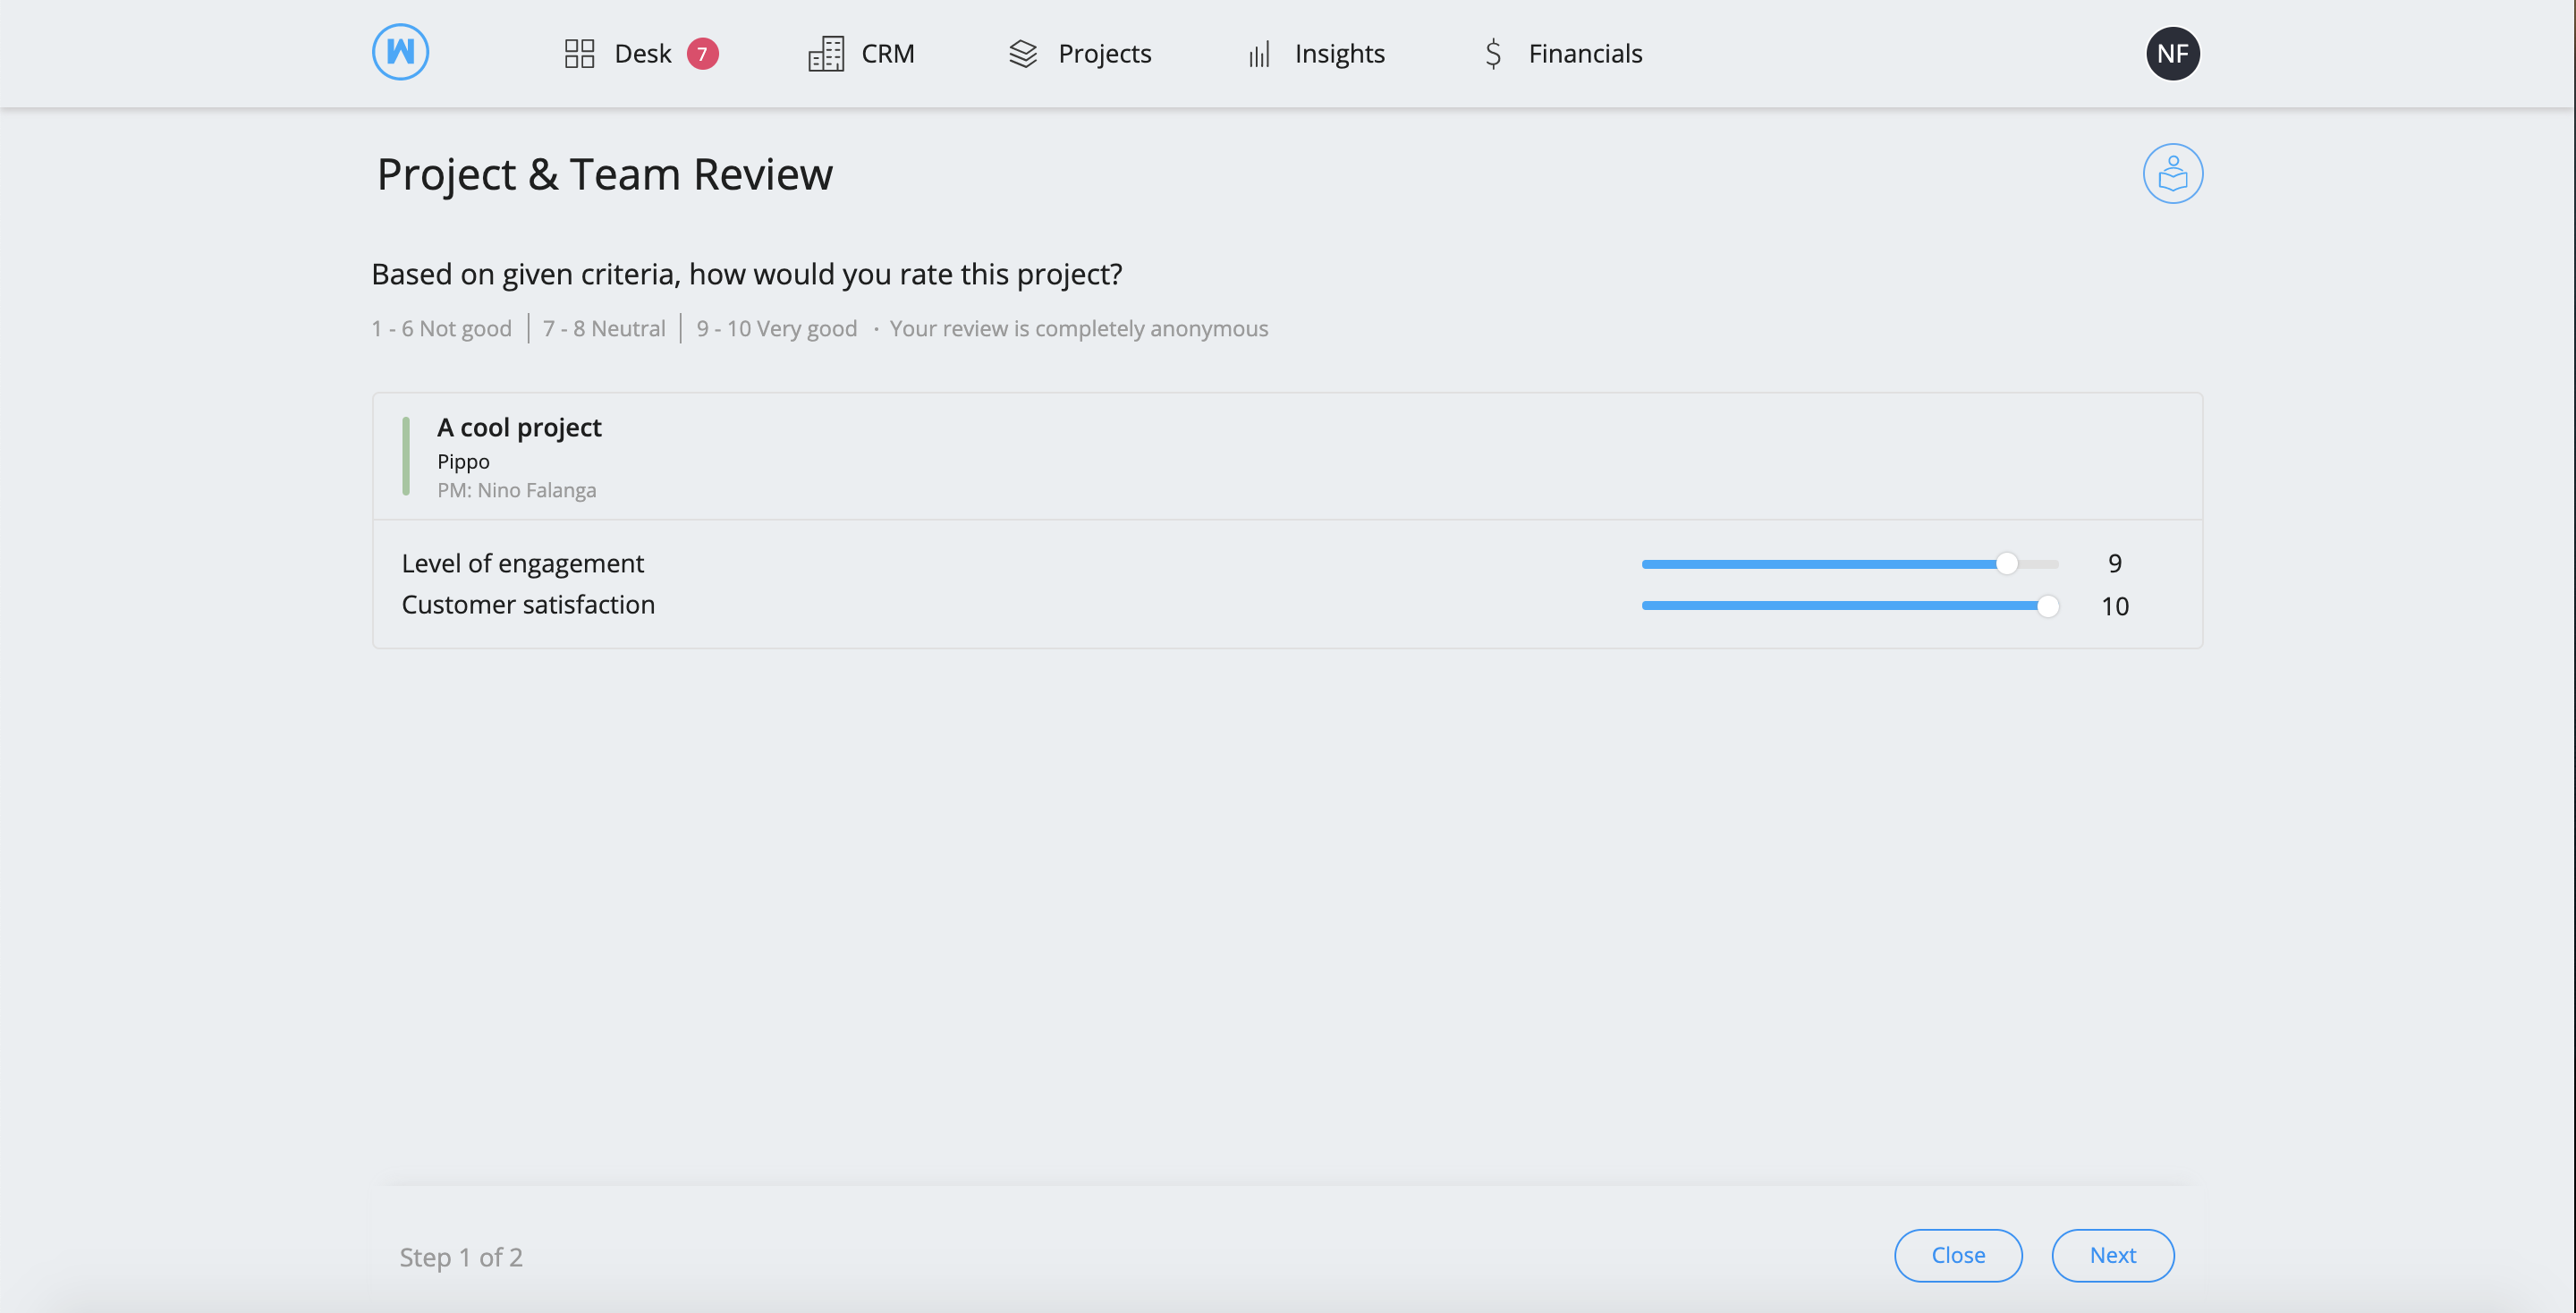
Project & Team Review
This tool allows the team to collect feedback on a project and the skills of both managers and collaborators who worked on the same project.
Project & Team Review must be enabled from Company Settings.
How it works
When a project has been archived, WETHOD will ask the project manager to request a review of the team members on the project.
This feature can also be used on selected job order categories, see section Project & Team members review settings to learn more. Pending review requests are shown in Desk.
Request intermediate reviews
Reviews can be requested any time by the project manager, or whoever has the permission to do so:
- From the project canvas, hit the button from the menu of actions available on the top bar of the page
- From the project list, click on a project and head the action buttons > click “more actions” > “Request Review”
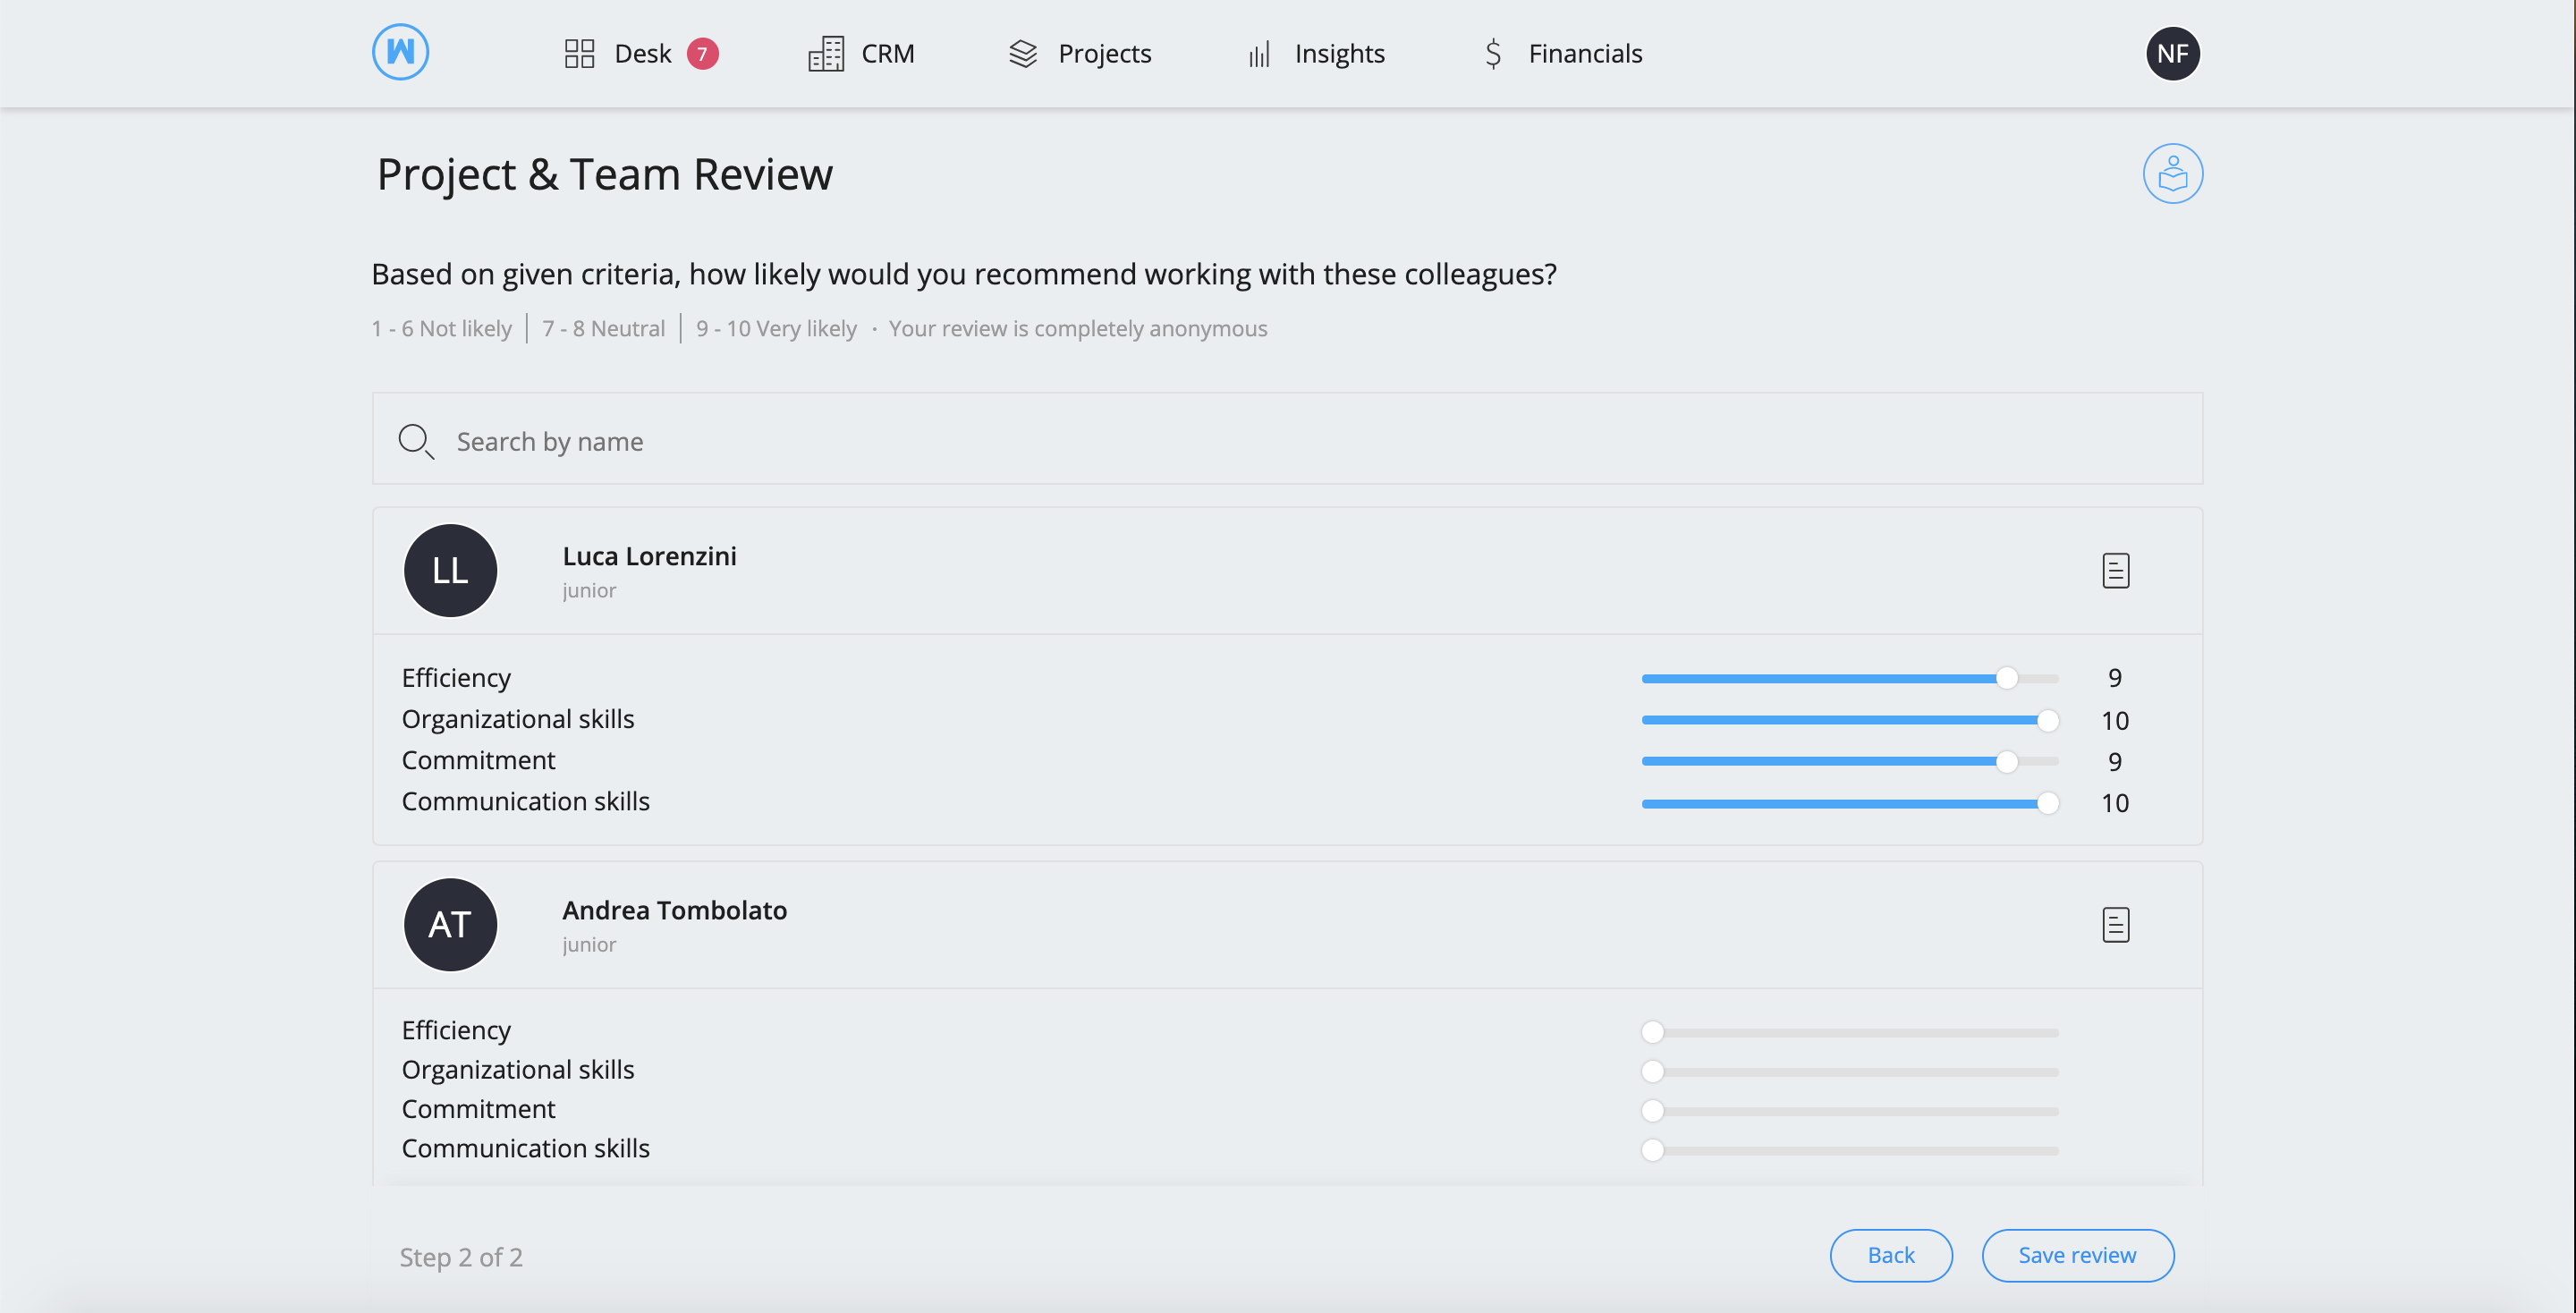
Criteria
Reviews are anonymous and are based on the Net Promoter Score (NPS), which is a scale that goes from 1 point to 10 points:
- From 1 to 6 kudos: Not good/Not likely
- From 7 to 8 kudos: Neutral
- From 9 to 10 kudos: Very good/Very likely
Each team member will be asked to review the project and the other members on each of the given criteria. Each project manager will be asked to review the project and its team members.
To add or edit criteria for the evaluation of projects and team members go to Project & Team members review settings.
Note
Changes to criteria are available only to next reviews, past reviews’ criteria are not updated to ensure consistency.
You can find user’s review results in the Profile section, while you need to visit the Canvas section to see project’s review results.
In order to maintain a review anonymous, you can set a minimum number of unique reviewers to collect feedback from before showing review’s results in the profile page and the project canvas. This can ben managed in Project & Team members review settings.
Note
To enable specific role’s permission to request a review go to menu Settings > Permissions > Pipeline > review.