Planning
Overview
The planning has two section:
- People Allocation helps you to look for teammates availability, resources allocation and check if the budget quota is respected.
- Projects’ Heatmap shows the daily amount of people planned on each project. It also offers a milestone system that allows your team to have an overview on the scheduled events.
- Production Plan where you can express the percentage of the project’s total value you are going to produce in each month.
Everything is arranged into a six weeks calendar, you can explore past and future using the horizontal scroll or clicking on the top right arrow navigator.
The blue dot in the calendar’s header highlights the current day.
People Allocation
People Allocation gives an overview of the team’s allocation on the projects in your company. From here you can plan your colleagues, filter them by skill, language, interest or tag, and access their profile pages to learn more about their backgrounds and goals.
This planning features three different views and planning options:
- Hourly: team allocation on projects by the hour;
- Daily: team allocation on projects on a daily basis;
- Weekly: team allocation on projects on a weekly basis.
People in your team
All your teammates are listed on the left with their allocation. Each person on the list features:
- A profile picture or the initials;
- Name and surname;
- Tags You can use tags to group employees into categories.
- Level of seniority (i.e. JR, SR, MGR, SRMGR);
- Objective and Key Results (OKR) The status of the teammate’s objectives and key results on each quarter of the year. Wethod shows whether the OKR of a quarter were (grey label) or were not placed (white label) by the user, and whether were discussed (blue) or checked (green) together with a sponsor;
- Allocation on projects Each slot shows the amount of hours, days or weeks a user is planned for a project. Each project follows the colour code of the job order categories used in your company.
Team allocation overview on a specific project
To select a project you have two options:
- Select the project from the “Select Project” button. Search for the project and pick it from the list.
- Select the project by clicking on a day/week on the plan. If the day/week features allocations on different projects, a window will open to show a list with the detail of the hours of allocation on each project. To select a project from the list, pick one and click “Select”.
When a project is selected Wethod will sort the people on the list by showing first all those who were planned on the project at least once – It’s better to work with people that are already aware of the challenge, right?
All the time slots planned for the selected project will be highlighted throughout the plan.
Plan teammates on a project
- Select a project.
- A box on the top of the page will show how many budget days and hours are available to plan, grouped by user level.
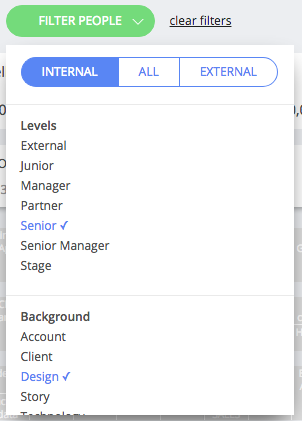
- If needed, you can apply multiple filters on people. For example, you may decide to see only the internal employees which are managers and have a background in design
- You can use the search bar even to filter people by skill, interest or language. Try to input something like skill:photoshop;skill:illustrator to find everybody who has a skill named “photoshop” and a skill named “illustrator”. Type language:italian;language:english to find everybody who speaks “Italian” and “English”, or instead type interest:reading to find everybody who loves reading.
- To plan for an hour, a half day or for an entire week, just position the mouse on the day/week you want to allocate and click to plan. Click and drag to quickly assign more than an hour, a half day or a week at once.
*If the day/week has some hours/days already planned on other projects, wethod allows you to plan the user on the remaining hours/days available for that day/week.
Note
You cannot plan people for the current day: if you don’t know what you have to do when you arrive at the office, how can you be productive?
A project manager can plan other people on a project only if a budget exists for that project.
When you run out of days, you can choose between two options:
- Review the budget and wait for the approval of a supervisor.
- Quickly convert available budget days from another user level.
Weekends
A five days calendar (Monday to Friday) is used by default.
If you enable “Use a 7-days week calendar” is enabled in company settings, the calendar will include Saturdays and Sundays.
If you enable “Highlight weekends” in company settings:
- Saturdays and Sundays will be shown using a special visual pattern to make more clear that they belong to weekend
- When one tries to plan on weekends, an alert will ask if he really want to plan over the weekend. If user clicks “Yes”, plan is confirmed and no similar warning appears until user changes the selected project. If user clicks “No”, weekends are removed from requested plans

Bank holidays
Similar to weekends, bank holidays are also highlighted with a special visual pattern. For each person in this section, the holidays linked to his company location are highlighted. When planning a person on a bank holiday a modal window asks if you want to proceed with the scheduling or you want to leave bank holiday days empty.
Repeat an allocation
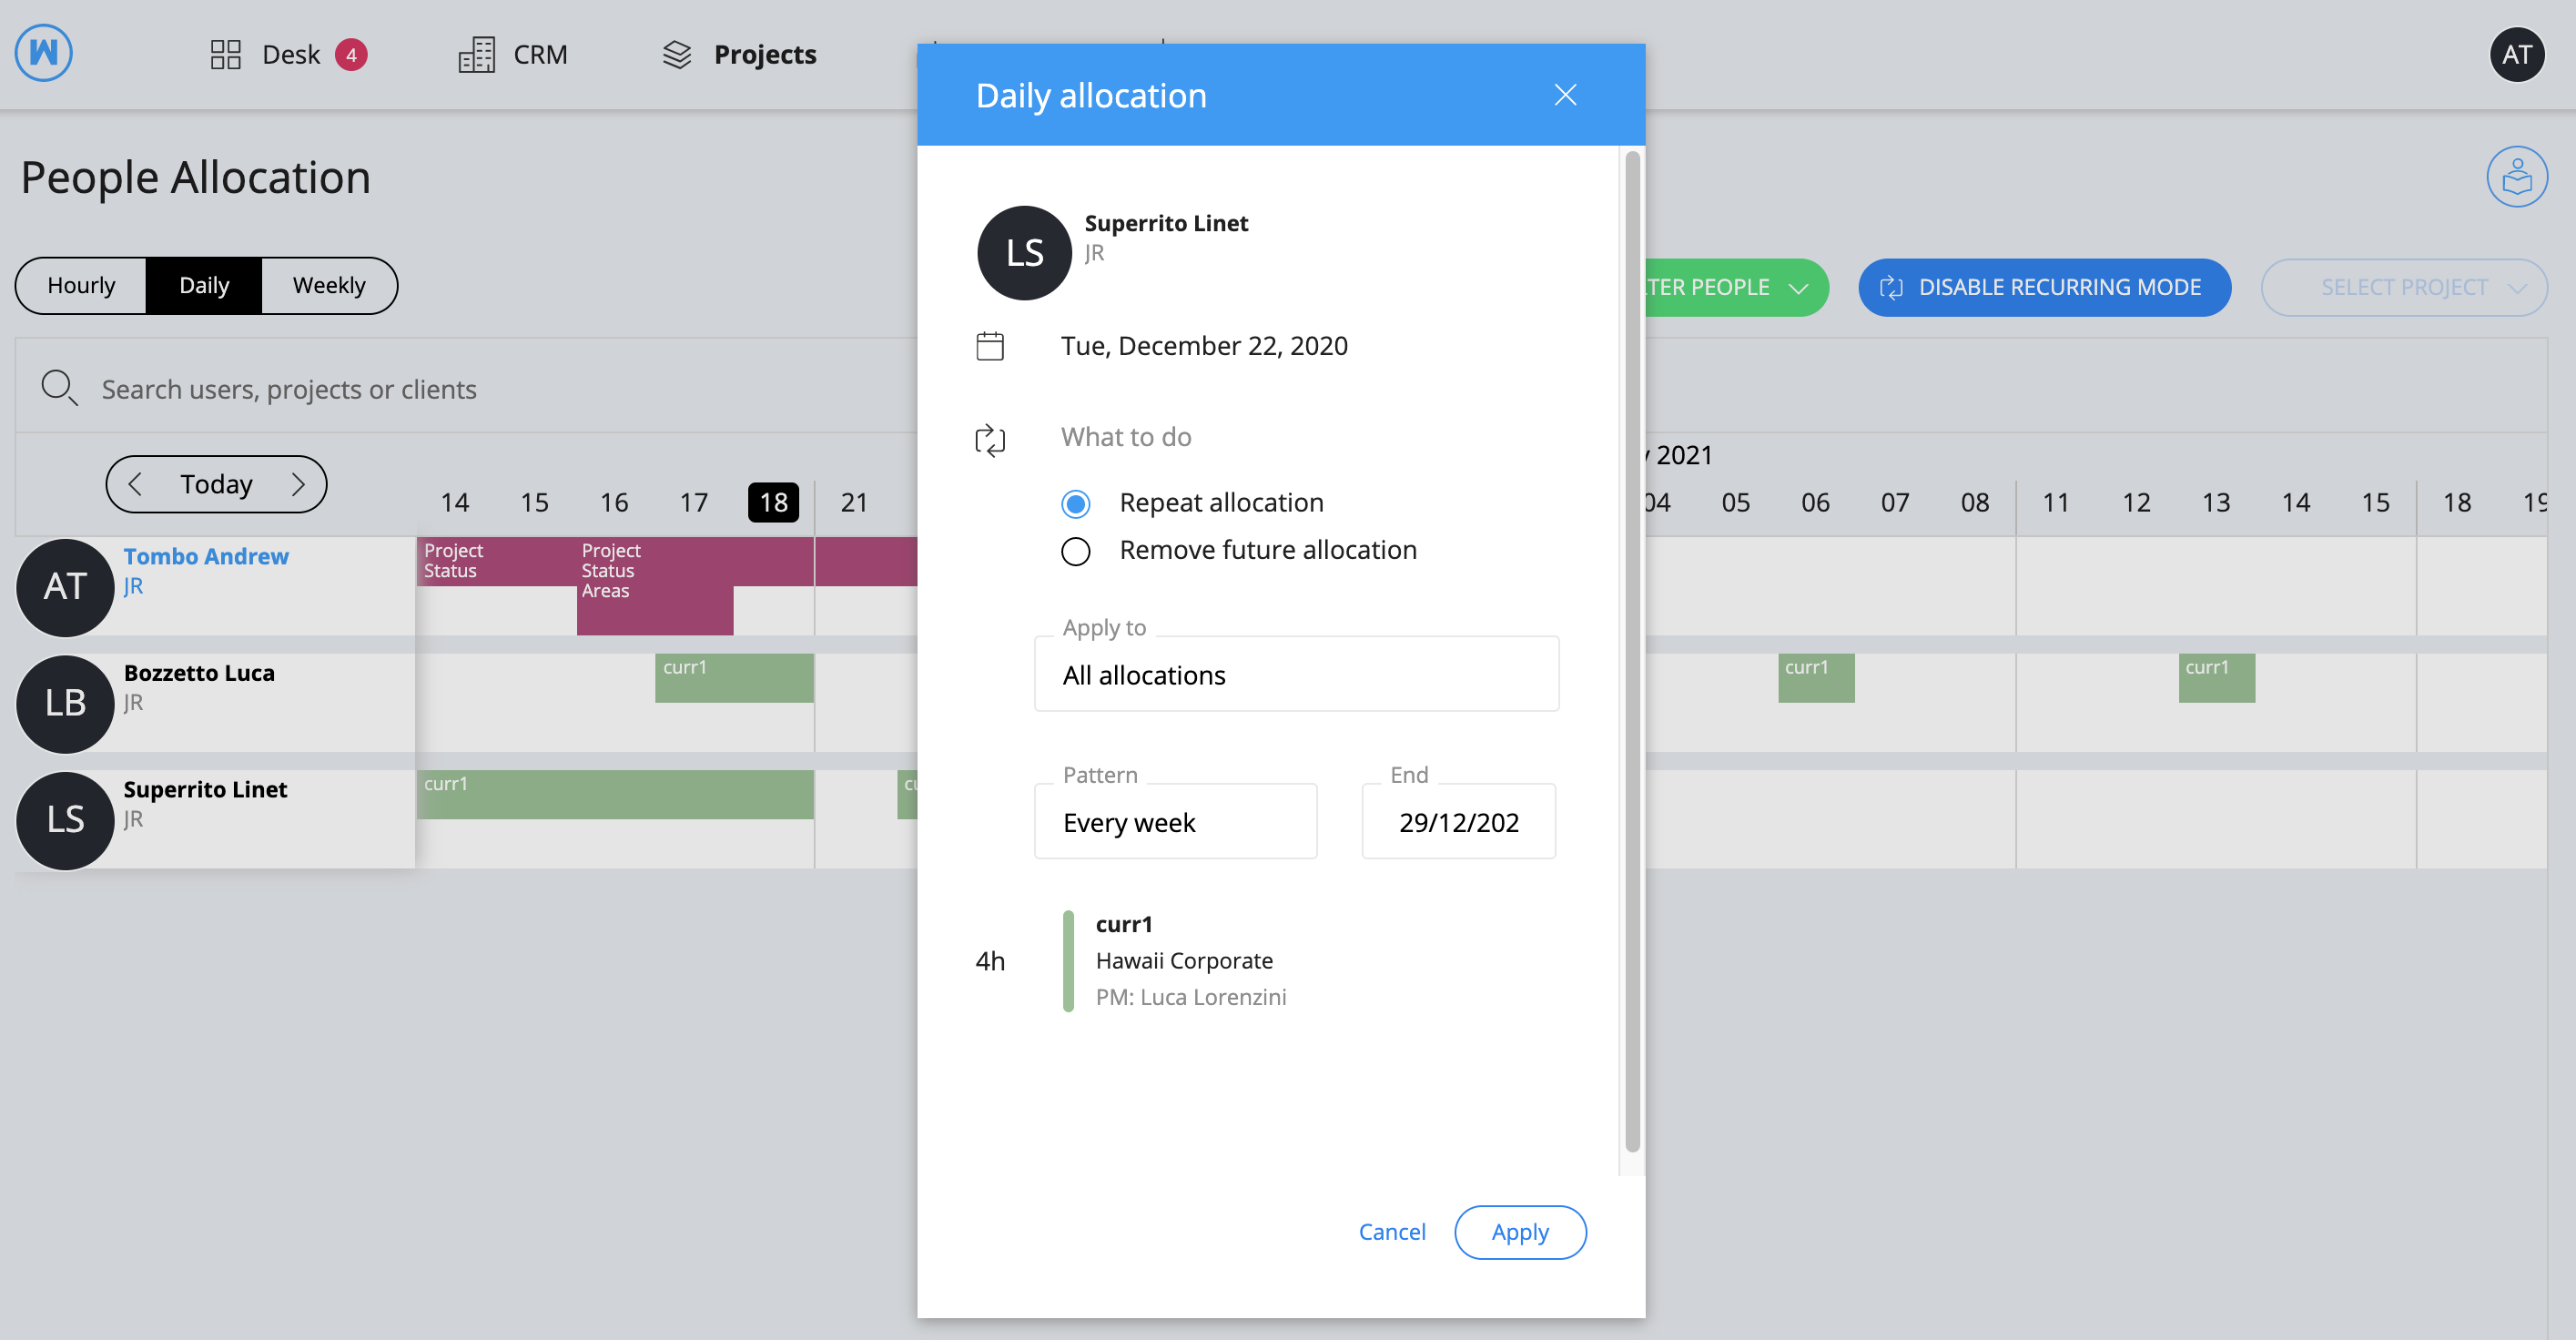
- Click “Enable recurring mode” on the top right
- Select the allocation you want to repeat
- Choose the option “Repeat allocation”
- Select “All allocations” to repeat the whole allocation in the day/week or “Single allocation” to choose how to repeat each project
- Choose the pattern of repetition
- Select an end date for the repetition
- Click “Plan”
- An alert will tell you if the budget is not sufficient to cover the repetition in the selected time range or if the repetition pattern clashes with existing allocations.
If you enable “Highlight weekends” in company settings and then you try to repeat something planned on a Saturday or Sunday, an alert will ask if you really want to repeat the weekend. If you deny, repetition is canceled
Remove future allocations
- Click “Enable recurring mode” on the top right
- Select the allocation you want to remove from the future
- Choose the option “Remove future allocations”
- Select an option between “All allocations” to remove the whole set of allocations from the future or “Single allocation” to remove a single allocation from the future.
- Select an end date.
- Click “Apply”
Convert available budget days from another user level
This feature allows you to quickly dispose of extra budget days, when needed, in order to allocate people on a project.
.gif)
You will access to a simple view of the project’s budget, including areas, tasks and the total number of available days per user level.
Use the number of available budget days from a user-level of your choice and see on the top the conversion into budget days you can use for other user-levels. You can only convert budget days within the same pricelist.
The conversion ratio is based on the daily cost of user-levels and it’s not possible to exceed the total amount of internal cost on the budget.
A new version of the budget is automatically created each time a user makes a conversion.
Note
You need to use all the available contingency to be able to convert days between levels.
Dealing with allocation requests
Projects with job order category of type “plan upon request” cannot be planned the usual way: user needs to visit Allocation Requests and ask to be allocated.
Allocation Requests
Particular job order categories may expect people to ask to be planned on them, this can be the case of job order categories representing holidays, leaves or - why not - R&D projects.
“Allocation requests” section is where all this requests can be created and managed.
To create a request:
- Click on “Add request” button to open related sidebar
- Select the project to request (required). You can only use a project which job order category has the “plan upon approval” flag enabled. To enable this flag just head to the company settings section
- Select start date and end date (required). Once both selected, for each day in the period you can express how many hours to request (1 - 8), by default each day is an 8 hours request
- Add notes if needed
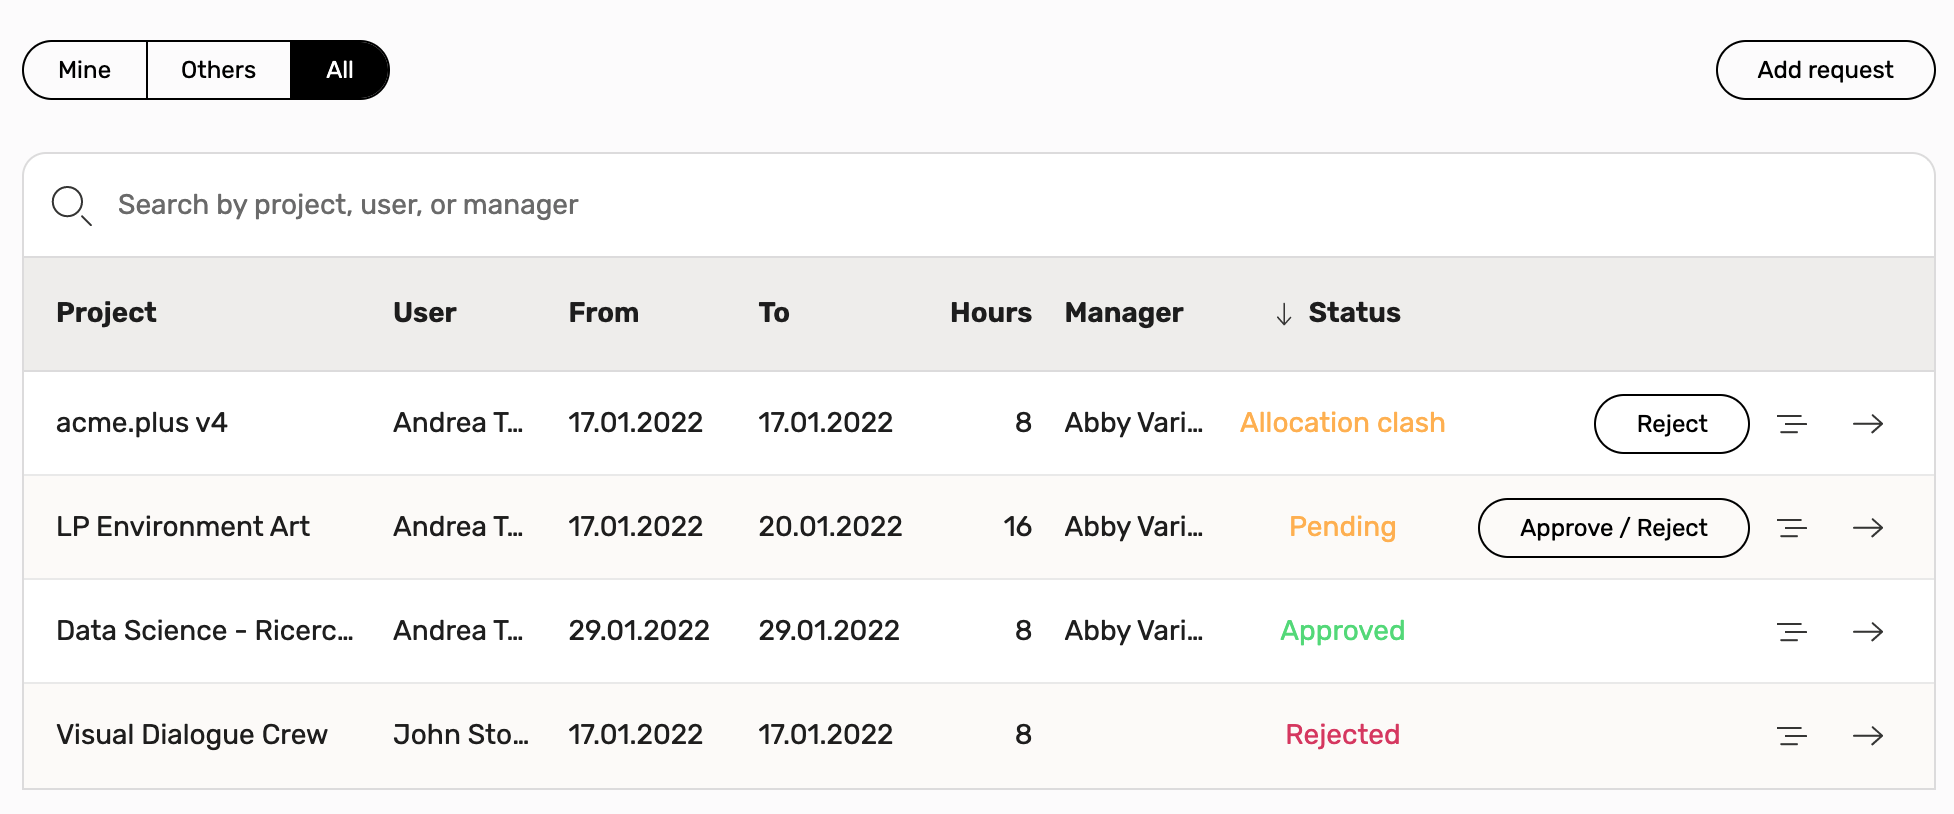
Once created, a request acquires the “Pending” status and:
- If the selected from-to is within 14 days an “urgent” mail notification is sent to the user allocation manager, if exists. Allocation manager for a user can be set from the team settings section
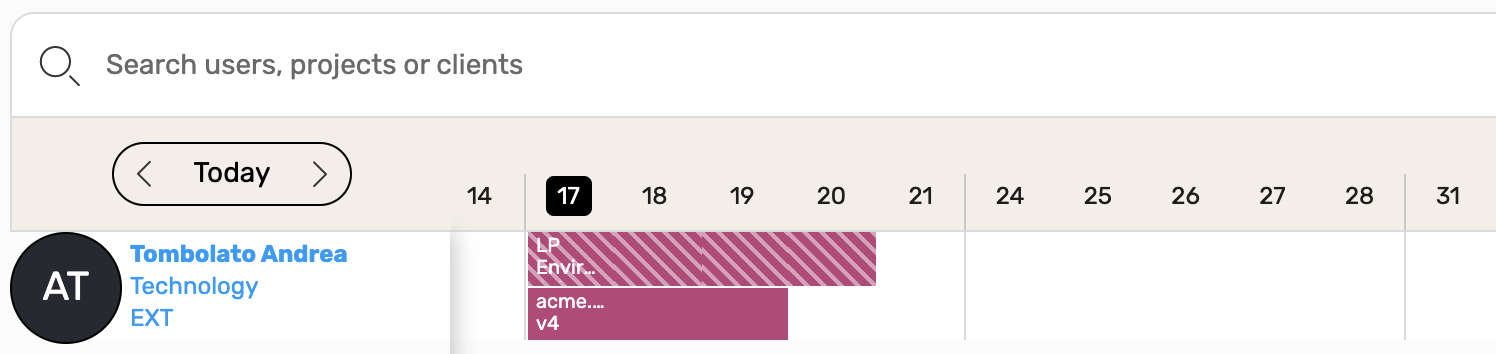
- Request is displayed in people allocation using a particular pattern
Now users with approve permission can see “Approve/reject” button and:
- Approve request: it gets “Approved” status and a mail notification is sent to the user who made the request
- Reject request: it gets “Rejected” status and a mail notification is sent to the user who made the request
Once approved, a request is shown in planning as a “normal” project. It still cannot be planned straight from here.
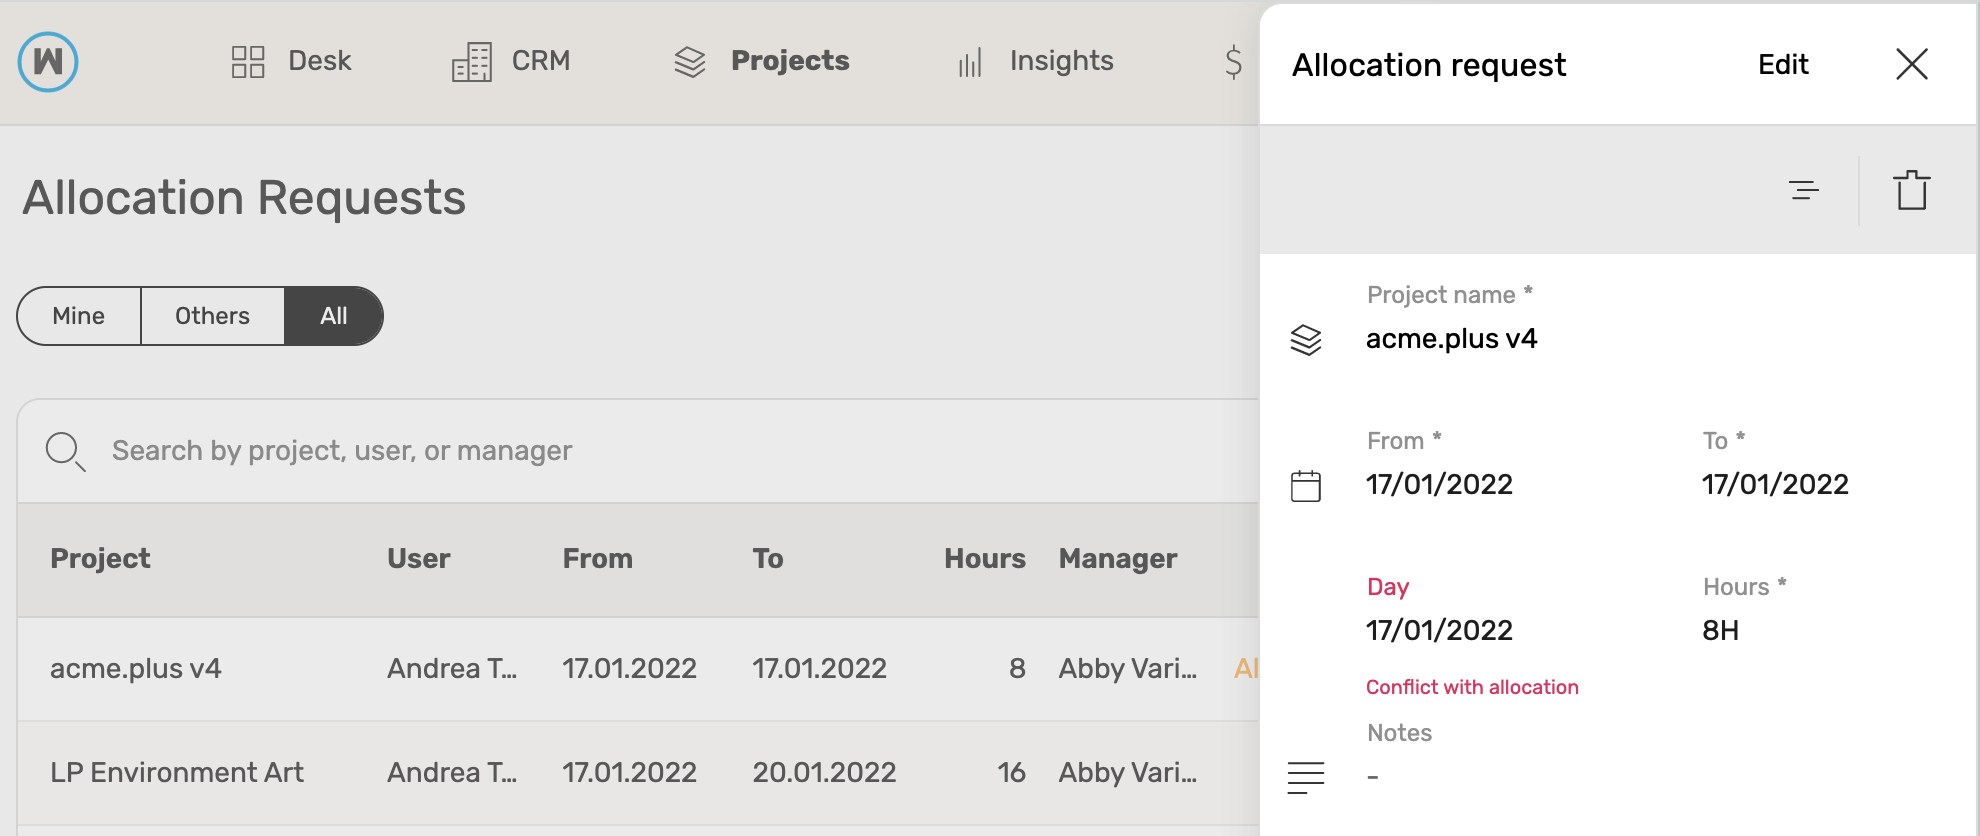
Users with edit permission can edit a request like this:
- Click on the request arrow button to open its sidebar
- Click on the edit button
A special edit permission is needed to edit and see others requests.
Approved and rejected requests cannot be edited but can be deleted.
When a request is deleted, it disappears from people allocation.
Creating or editing a pending request can create conflicts if:
- In the requested period there is at least one hour already planned
- In the requested period there is at least one hour belonging to another request
Requests with conflicts:
- Get a particular status
- Does not appear in people allocation
- Shows conflict days inside details sidebar
- Cannot be approved: they can just be edited, deleted or rejected
If a request has conflict with another pending request only the last created request will be marked as “conflict”, the existing one keeps its status.
Once a week an email containing the recap of all pending planning requests is sent to all allocation managers (excluding “urgent” emails).
Projects’ Heatmap
This is useful to show the weight of planned people on each project: the darker is the color of a cell, the more people are planned on the project that day.
The color’s range is made up of 10 levels from white to blue, where the darkest blue represents the most planned people on a project in a day for the visible range of time.
By clicking on a day you can:
- See who is planned on a project for the day
- See and edit the event related to the day: usually a project’s life is fulfilled of important events, by tracking them you’re giving a general point of view to all of your organization. This is also useful to avoid overlapping of two or more important events that usually need a lot of resources.
You can hide a project by clicking on the “X” near the project’s name.
Note
The heatmap is always updated based on the visible projects and date range.
Production Plan
Here you can express the percentage of the project’s value you plan to produce for each month.
You will only see the projects with a value greater than 0: you cannot edit the plan when there is no value.
Past months are read-only and are automatically populated with the real production, based on the month’s project status. You can edit future months but remember: a production plan can be saved only if you’ve distributed the 100% of its value, you can easily check this by looking at the total: a red total means that your planning is someway different from 100%.
Each time you edit a past project status’ week or when a month ends, the production plan for that week is recalculated in order to allocate the remaining production or to adjust incoherent plans. The adjustments are reported as orange monthly apex.
A solid blue line indicates the project’s duration, a dashed line instead tells you that the project’s boundaries (the project’s start/end) are outside the visible planning’s portion. When you move the start or end date of a project with probability lower than 90%, its production plan will reflect the changes, adapting its duration and distributing accordingly.
Other than searching projects by name, pm or client, you can even filter them by who’s in charge for them: Mine shows you all the projects where you’re pm or account while Others … well, we think you’re smart enough to understand it by yourself.
If you’re editing a project, you can move its whole duration or the plan for a single month by simply dragging them as shown in the GIF below. If you change a project’s duration, it will be saved as soon as you click on the “save” button.
Use the “Auto distribution” function on a project to spread it’s remaining plan on the future months of its duration.
Note
The production plan calendar follows ISO 8601, this means that a week belongs to a particular month only if its thursday belongs to that month